Retail Tenant Improvements: What Makes a Store Buildout Succeed Before the First Customer Walks In

“Did you know that nearly 60% of retail tenant improvement projects go over budget due to overlooked details in commercial real estate leases? Understanding the process from day one can mean the difference between costly delays and grand opening success.”

What You’ll Learn About Retail Tenant Improvement

  • What retail tenant improvement means for your business
  • How TI allowances influence your buildout budget
  • Step-by-step process for tenant improvements in commercial real estate
  • Real-world examples and red flags to watch out for
  • Practical tips for DTLA and major metros
  • Checklist and questions to avoid costly mistakes

retail tenant improvement modern retail storefront under renovation with store manager and contractor, blueprints, construction materials, and warm natural lighting

Retail Tenant Improvement Defined: Quick and Clear

What Is Retail Tenant Improvement?

Retail tenant improvement, often referred to as “TI” in the commercial real estate world, is the process of customizing a leased commercial space to fit the needs of a specific tenant. Whether you’re moving into a shell or updating an older retail footprint, tenant improvements include everything from painting and lighting upgrades to major renovations such as adding new restrooms, installing an HVAC system, or building out a kitchen. The goal is to create a functional, appealing retail environment that matches the tenant’s business operations and brand image. For most small business owners and franchisees, the scope of retail tenant improvement is a critical factor in both the start-up timeline and overall success of the store, as it can heavily influence customer experience, workflow, and long-term costs associated with operating in a given commercial property.

Unlike standard maintenance, tenant improvements are often tailored to the unique branding, workflow requirements, and retail equipment of the incoming business. These investments are typically negotiated during the leasing process, either being paid directly by the tenant, reimbursed through a tenant improvement allowance from the landlord, or a combination of both. It’s important to distinguish “tenant improvement” from “leasehold improvements,” which generally refer to permanent changes that remain with the space after the lease ends. Understanding these definitions arms tenants and property managers with the clarity needed when discussing lease terms, negotiating costs, and preparing for improvement construction. For any commercial tenant, clear communication around these improvements is a key part of ensuring the project stays on time and on budget.

How Retail Tenant Improvements Fit Into Real Estate Leases

  • Defining tenant improvement, tenant improvements, TI allowance, and improvement allowances
  • Contrast with leasehold improvements and commercial tenant upgrades

Every retail lease is unique, but the concept of a tenant improvement allowance (TI allowance) is central to nearly all commercial real estate negotiations. This allowance is an agreed-upon amount that the landlord provides—either in cash or as a credit—to help cover the cost of tailoring the retail or commercial space to the tenant’s needs. Improvement allowances may only cover certain items, such as structural work, electrical, plumbing, and code-compliant upgrades, while finishes like branding elements might fall outside the allowance. The lease terms should specify not only the value of the TI allowance but also which construction costs are included, reimbursement protocols, timelines for project completion, and what happens if the budget is exceeded.

Commercial leases typically also clarify the distinction between tenant improvements, which are built specifically for a business and often removable, and leasehold improvements, which are permanent upgrades that benefit the property owner after lease termination. Some leases include built-in incentives for making higher-value improvements to the property, while others restrict what upgrades tenants can make without landlord approval. Knowing the language around improvement allowances, commercial tenant upgrades, and leasehold improvements helps both tenants and landlords avoid confusion and unexpected expenses throughout the improvement project life cycle.

retail tenant improvement architectural diagram highlighting tenant improvement stages, blueprints, and material samples

Why Retail Tenant Improvement Matters in Commercial Real Estate

The Impact of Tenant Improvements on Store Opening Success

A successful store opening hinges on meticulous planning around tenant improvements. For many retailers, the difference between an underwhelming launch and a bustling grand opening can be traced back to the strategy, timing, and quality of improvement construction. Tenant improvement not only tailors the physical space to operational needs but also enables compliance with building code and modern retail standards. Locations with generous improvement allowances often attract top tenants because those funds help cover the significant construction costs of readying the leased space. By negotiating smart TI allowances and leveraging the right improvement project partners, business owners can ensure their store layout, branding, and amenities are up to par before the first customer ever steps inside.

The broader commercial real estate market often views tenant improvement allowances as a competitive differentiator among retail properties. For tenants, the right allowance means more flexibility in design and the ability to implement upgrades that support efficiency, ADA compliance, and unique retail experiences. For landlords and property managers, investment in tenant improvement can boost property value, attract high-caliber tenants, and shorten vacancy durations. In essence, tenant improvements bridge the gap between raw space and a profitable, customer-ready environment—a key part of commercial leasing strategy.

The Real Estate Broker and Property Manager’s Role in Tenant Improvement

  • Commercial property considerations
  • How tenant improvement allowances drive location decisions

Your real estate broker and property manager play critical roles in the tenant improvement journey. A good broker will advocate for a tenant improvement allowance that matches your projected construction cost and the realities of the current estate market. They help you navigate commercial lease agreements, highlight hidden costs or exclusions, and ensure timelines are realistic for your market—especially in dense metros like DTLA, where access, parking, and after-hours work can complicate improvement construction. Property managers, meanwhile, oversee day-to-day logistics, coordinate with your general contractor, and facilitate landlord approvals that are needed before construction can begin. Their familiarity with building codes and city permitting processes makes them invaluable, helping avoid missteps that can lead to costly delays.

Choosing a broker and property manager experienced in retail tenant improvements, particularly in your local commercial real estate market, sets the foundation for a successful project. They help ensure your TI allowance covers the necessities, from code compliance upgrades to finishing touches, while identifying which expenses are the tenant’s responsibility and which are eligible landlord concessions. This collaborative approach can drive significant cost savings and operational peace of mind for retailers of all sizes.

real estate broker retail tenant improvement lease review at modern office table, documents and coffee cups, city view outside

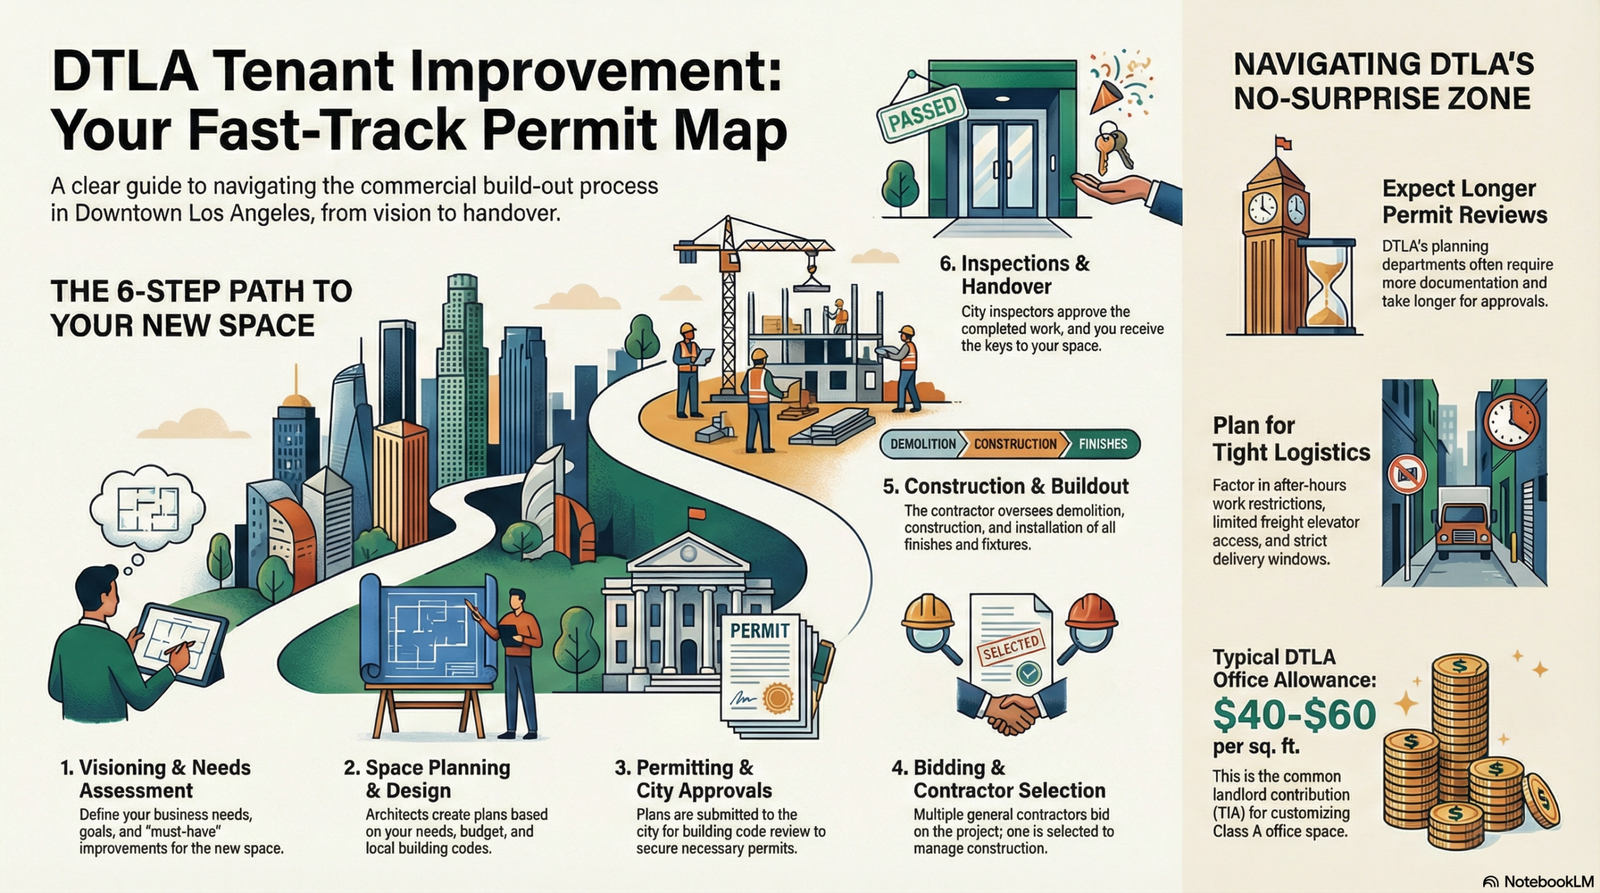
Step-by-Step Guide: Navigating Retail Tenant Improvement Construction

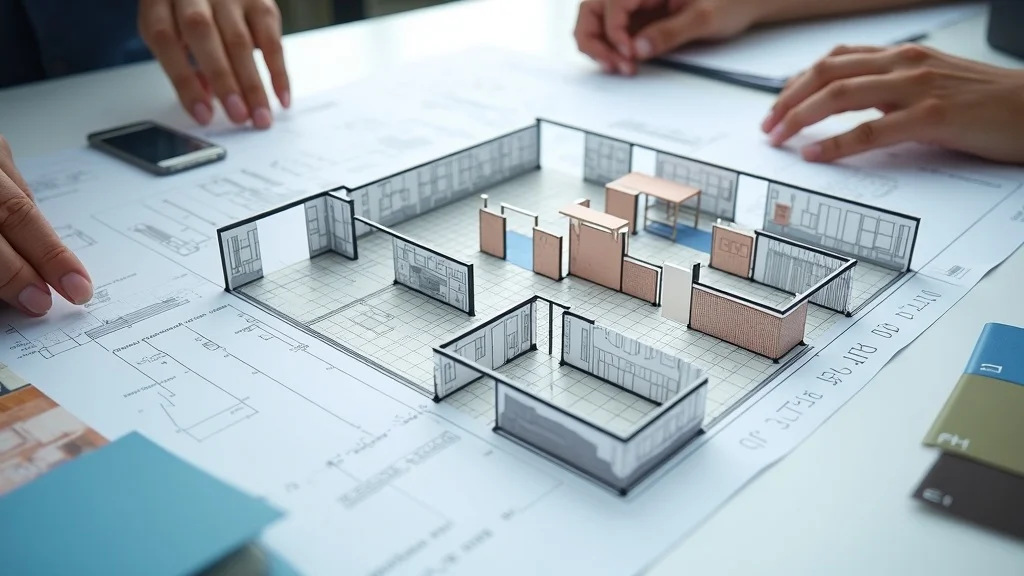
Step 1: Planning Your Retail Buildout for Tenant Improvements

Before signing any lease, clearly outline your business requirements: What layout, finishes, and amenities are critical? What building code upgrades are needed for compliance? Map out essential improvements—walls, floors, lighting, HVAC—alongside “must-haves” like ADA accessibility or kitchen installations

In busy metro areas like DTLA, pay close attention to factors such as site access (think: limited parking, tight delivery schedules), shared utilities, and building rules that may restrict hours or methods for noisy or messy work. Local property management and permitting nuances may extend lead times, so ask about typical scheduling hurdles and maintain open channels with your property owner and city contacts. The better your up-front planning, the fewer surprises and delays will interrupt your improvement construction timeline—saving your budget and your nerves.

Step 2: Negotiating Your Tenant Improvement Allowance

Clarify what your allowance will and won’t cover—does it include only base building systems or also cosmetic finishes? Will you receive lump-sum funding, reimbursement after work, or direct payments to contractors? These details must be spelled out in the lease agreement

Focus on negotiating flexible timelines for submitting invoices and obtaining landlord approvals. Insist on detailed documentation in your lease for what counts toward the TI allowance: design fees, permits, utility upgrades, and code compliance costs. Make sure any exclusions, such as branding or removable fixtures, are understood in advance. A robust negotiation at this stage ensures you have the resources needed to cover the cost of readiness and reduces the risk of going over budget due to misunderstanding or scope creep in your improvement project.

Step 3: Approval, Permits, and Building Code Compliance

Approvals, permits, and adherence to building code are vital steps that can make or break your improvement construction schedule. After design documents are finalized, submit them to your landlord and city for review. Expect rounds of back-and-forth—plan for extra time. City governments, especially in urban commercial real estate markets like DTLA, often have strict requirements regarding ADA accessibility, fire safety, energy efficiency, and mechanical systems. If your plans don’t meet local code, revisions must be made before any work begins.

Permitting delays can quickly push out your opening date, so collaborate with your project manager, architect, or permitting expeditor familiar with the estate market and code requirements. Don’t forget internal building approvals: some commercial properties require multiple layers of owner or HOA authorization. Ensuring all approvals are in place before ordering materials or mobilizing the crew is a key part of safeguarding your improvement project schedule and budget.

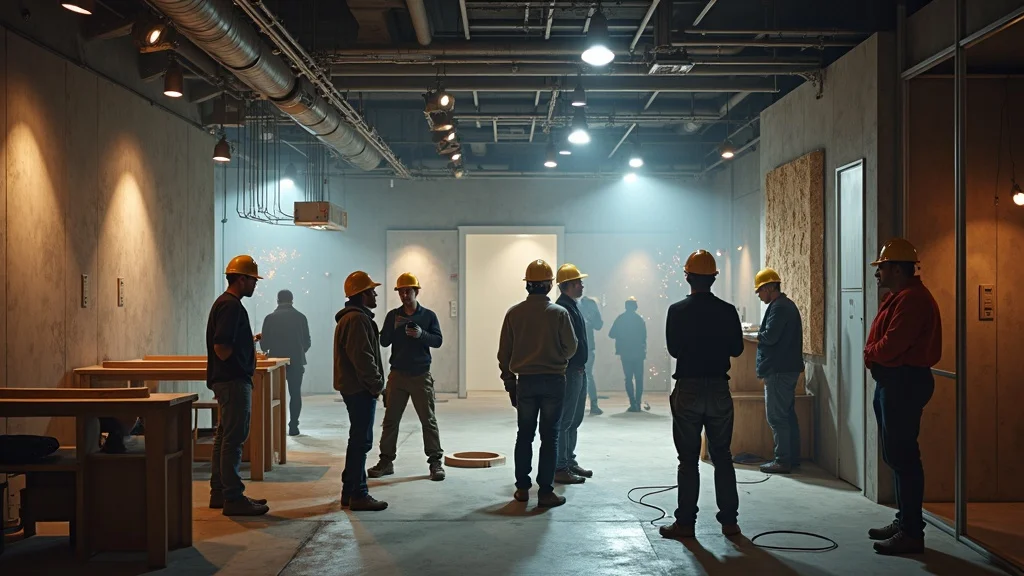
Step 4: Kicking Off Improvement Construction

The construction phase is where plans become reality—and attention to detail is non-negotiable. Once permits are secured and landlord approvals complete, your general contractor manages demolition, buildout (framing, flooring, lighting, plumbing), and installation of interior finishes. In commercial tenant improvement projects, coordinated project management is essential to keep all trades working in concert, especially when space and after-hours access are tightly controlled, as is often the case in DTLA commercial spaces. Monitor progress against scope, flagging any change orders or field surprises promptly to keep costs contained.

Daily or weekly check-ins with your PM help spot issues with material availability, sequencing, and code compliance early. Some landlords provide a property management liaison to facilitate access and manage noise or debris complaints from neighboring tenants. Ask upfront about building-specific logistics so you’re not blindsided by unexpected constraints that can add days or weeks to your improvement construction. Ultimately, proactive involvement means fewer surprises and smoother delivery—setting your team up for a timely, successful grand opening.

retail tenant improvement energetic construction site interior with workers installing fixtures and lighting in retail store buildout

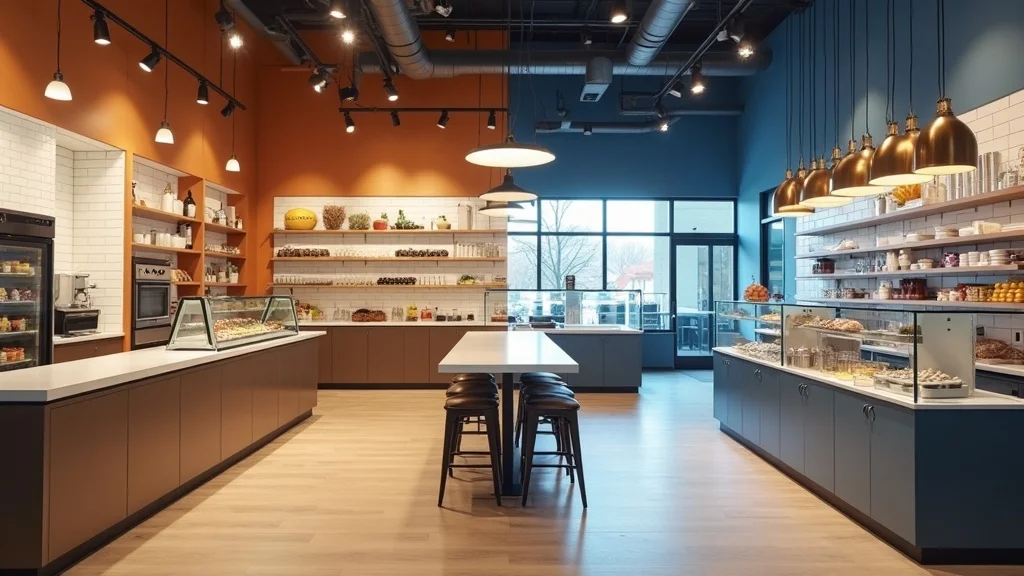
Step 5: Handover, Punchlists, and Opening Day Readiness

  • Typical timelines and common improvement construction pitfalls
  • Special DTLA logistics: access, inspections, after-hours constraints

As construction wraps, initiate a thorough punchlist walk-through. This checklist-driven process—often led by your project manager and broker—identifies unfinished work, needed corrections, and any code compliance items that must be resolved before receiving a certificate of occupancy or landlord sign-off. Typical improvement project timelines for retail tenant improvement range from 8-20 weeks, depending on buildout complexity and permitting cycles.

Especially in dense urban environments like DTLA, final approvals may require managing after-hours inspections or sequencing work around strict building access schedules. Plan for a soft-opening period in case equipment lead times or final inspections run over. Ask your property owner in writing for any facility-specific move-in requirements and confirm insurance coverage for your opening week. Planning for minor hiccups at the end ensures a smooth grand opening—and keeps your focus on welcoming the first customers.

Retail Tenant Improvement Allowances: Typical Ranges by Market
Market Allowance per Square Foot (Low) Allowance per Square Foot (High) Notes
DTLA (Downtown LA) $30 $70 Varies by space age, fit-out needs, and landlord competition
LA Metro $25 $60 Prime locations and new developments trend higher
National Averages $15 $50 Market-dependent, with coastal cities at top end

Retail Tenant Improvement Allowance: Understanding Leverage and Risk

How Improvement Allowance Shapes Lease Agreements

Tenant improvement allowances function as powerful leverage for tenants during lease negotiation. The improvement allowance impacts your overall project budget as well as your risk exposure, as every dollar provided by the landlord reduces what you need to finance out-of-pocket (or via business loans). In most lease agreements, the improvement allowance is tied to specific documentation—meaning landlords typically reimburse tenants only for eligible, pre-approved construction costs.

Since not all expenses may be covered, tenants need to scrutinize the fine print to understand which items—design fees, permits, specialty fixtures, code upgrades—count toward the allowance. Consult with your broker during lease negotiations to ensure allowances are sufficient and clarify reimbursement processes. In hot real estate markets, a good improvement allowance can make a tough location a sound investment, while in tenant-favored markets, more generous allowances and better terms may be available.

TI Allowance, Landlord Concessions, and the Small Print

  • Negotiating improvement allowance and tenant improvement allowance in commercial leases
  • Common red flags and exclusions

Negotiating the TI allowance is only half the battle; reviewing for red flags and exclusions is equally vital. Watch for requirements that you front the full cost before reimbursement, restrictions that prevent rolling unused funds into future rent, or clauses that make the allowance void if the opening date slips. Some landlords provide concessions like free rent during buildout or contribute to soft costs, but these can come with strings attached.

Common red flags include strict timeframes for TI submission, “use it or lose it” language, exclusions for branded decor, or not counting critical code compliance upgrades toward the allowance. Always insist on clear documentation in your lease so you—or your construction team—avoid nasty surprises. The best practice is to negotiate for maximum flexibility, involving all parties (broker, attorney, GC) in lease review for any improvement project.

tenant improvement lease negotiation close-up of hands marking a contract at a wooden desk

Real-World Examples of Tenant Improvements in Retail

  • Simple tenant improvement: paint, lighting
  • Major tenant improvement: full buildout, HVAC, kitchen, ADA upgrades
  • DTLA constraints and creative workarounds

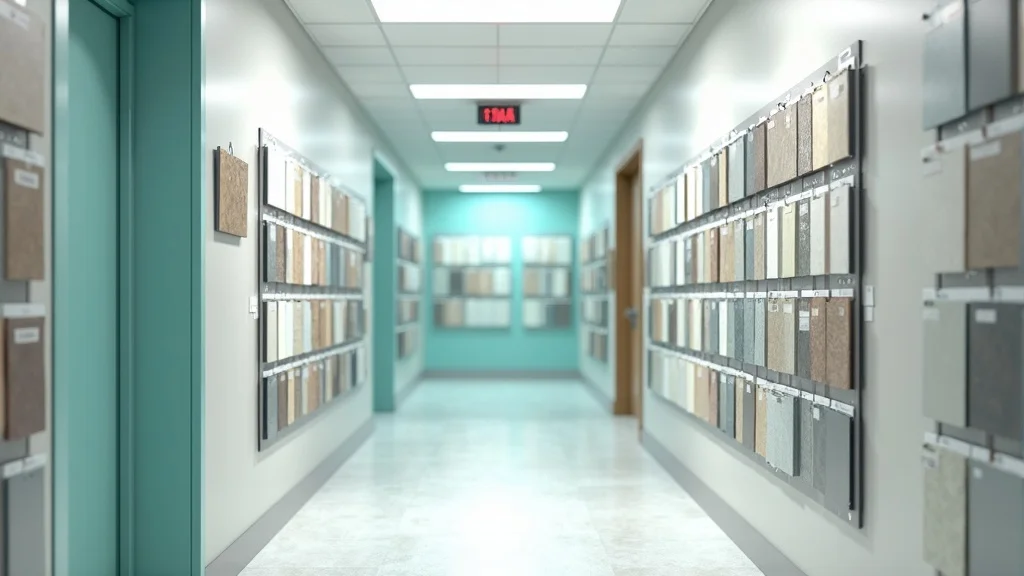
Examples of tenant improvement abound across the retail sector. A small independent boutique might require only simple upgrades: fresh paint, new LED fixtures, and upgraded signage. For larger or concept-driven retailers, major tenant improvements could mean full buildouts with additional walls, complete HVAC upgrades, kitchen or washroom installations, and bringing older leased space up to ADA code compliance. In DTLA, creative workarounds are sometimes required due to high construction cost, limited access for deliveries, and constraints on after-hours noisy work. These metro realities mean tenants often opt for modular setups, lightweight materials, or schedule noisy construction phases outside building peak times.

Savvy tenants and brokers look at what similar businesses in the area have accomplished with their TI, and use those real-world examples to guide negotiation and budgeting. As with all improvement construction, open communication with your general contractor and regular site visits are invaluable for catching problems before they cause delays.

tenant improvement side-by-side image of basic upgrades (paint, lighting) and major upgrades (HVAC, kitchen, ADA compliance) in modern retail shell

Tenant Improvements Checklist: Questions to Ask Your GC, PM, or Broker

  • Key tenant improvement allowance questions
  • Essential improvement construction and code compliance queries
  • Questions specific to commercial tenant fit-outs in DTLA

A thorough checklist is every tenant’s best defense against avoidable mistakes. First, clarify with your general contractor (GC) if the full scope of improvements is included in their bid, and confirm responsibility between you, the GC, and the landlord for each item. Ask your project manager (PM) about lead times for materials, required inspections, and whether your allowance covers design fees, permitting, and code upgrades. For urban sites like DTLA, be sure to ask about building access (hours, loading dock use), neighboring tenant restrictions, and city-mandated work-hour constraints. These metro-specific issues can turn a straightforward project into a logistical headache if overlooked.

Don’t forget to verify insurance, clarify change order and cost overrun procedures, and set expectations with your broker about what support they provide before, during, and after opening. A well-documented, shared checklist keeps everyone accountable and ensures critical improvement construction steps are not missed.

“Your retail buildout is only as strong as your lease and your checklist. Surprises are expensive—anticipate them and plan for flexibility.” – Experienced Commercial Tenant Broker

Retail Tenant Improvement FAQs

What is the average tenant improvement allowance for retail?

Answer: Learn what to expect in different markets (DTLA, LA metro, national), influencing factors, and how allowances are calculated.

The average retail tenant improvement allowance can range widely by location and property class. In DTLA, allowances often range from $30–$70 per square foot, depending on the age of the space, landlord competitiveness, and required complexity of the buildout. LA metro averages tend to hover between $25–$60 per square foot. Nationally, averages span $15–$50 per square foot, with premium markets like San Francisco or New York reaching the top of this range. Factors impacting TI allowance include the overall commercial real estate market, length of lease term, vacancy rates, and whether the property owner anticipates recouping investment through higher rents or improved property value. Always ask your broker for recent comparables to ensure your TI allowance aligns with market conditions and your unique improvement needs.

infographic retail tenant improvement US map with regional TI allowance averages, money and tape measure icons

What is an example of a tenant improvement?

Answer: Examples range from basic finishes (flooring, walls) to major upgrades (restroom additions, kitchen buildouts, ADA compliance) and how these fit inside improvement allowances.

A tenant improvement can be as simple as replacing old carpeting with engineered hardwood, adding new paint and lighting fixtures, or installing temporary walls for product display. More extensive examples include converting a bare shell space into a fully equipped food retail location—adding commercial kitchen equipment, ADA-compliant bathroom facilities, HVAC, upgraded utilities, and sophisticated security systems. Most improvement allowances will cover permanent fixtures required for code compliance and building system upgrades, but may exclude removable branding or décor, so it’s crucial to match your improvement plans to the terms of your lease and TI allowance.

What is a reasonable tenant improvement allowance?

Answer: Considerations for reasonableness (project type, square footage, market), benchmarks for commercial real estate, and negotiation tips.

A reasonable tenant improvement allowance depends on the size of the commercial space, complexity and duration of the project, and the prevailing real estate market. As a benchmark, average allowances of $30–$50 per square foot are considered reasonable for mid-market retail buildouts, while specialized or luxury spaces may require more. Always factor in soft costs like architectural fees, permitting, and compliance upgrades. During negotiation, leverage competing lease offers and recent deal data to maximize your TI and document all commitments in the lease agreement.

retail tenant improvement project team in design meeting reviewing checklists and floorplans, material samples

What is a commercial tenant improvement?

Answer: Breakdown of tenant improvement meaning in retail and other commercial property settings, with practical implications for leaseholders.

A commercial tenant improvement covers any modification, investment, or renovation made to a leased commercial space to make it suitable for the tenant’s business operations. In retail, this includes everything from floor and wall finishes to new lighting, ADA accessibility, HVAC installation, back-of-house offices, restrooms, and storefront reconfiguration. For leaseholders, understanding the boundaries of what is classified as a tenant improvement (versus leasehold improvements or landlord upgrades) ensures clarity over who pays for what, which upgrades remain at lease end, and how to maximize your TI allowance during lease negotiation and buildout.

Lists, Watchouts, and Money Savers

  • Checklist of key phases for tenant improvement
  • Hidden costs and delays in commercial tenant improvements
  • Common missteps (e.g., underestimating lead times, not verifying code compliance, missing landlord approvals)

Key phases: Pre-lease planning, allowance negotiation, plan approvals, permitting, buildout, final inspections, punchlists, and opening preparations.

Hidden costs: Design and architect fees, change orders, code compliance upgrades, after-hours labor, and soft costs like insurance or utility deposits—often overlooked in early budgeting.

Common missteps: Underestimating construction lead times (especially post-pandemic), failing to obtain all landlord approvals in writing, missing code requirements or required city inspections, and not involving your project team early in the lease negotiation. Every missed detail can lead to costly delays that push back opening dates and drive costs higher.

professional tenant improvement checklist with hardhat, tape measure, and coffee mug in retail renovation

Making Retail TI Work for You

  • Start early and involve all stakeholders in tenant improvement decisions
  • Negotiate your tenant improvement allowance with precision
  • Use a checklist for every step—budgeting, design, construction, compliance

Retail T.I. and Related Commercial Real Estate Concerns

  • What if my tenant improvement costs exceed the allowance?
    You are typically responsible for any amounts over your negotiated TI. Plan for a contingency fund in your budget and explore additional landlord concessions if scope creep arises during buildout.
  • Can I roll over unused tenant improvement funds?
    In most cases, no—unless specifically negotiated. Some leases allow excess TI to offset rent, but most are “use it or lose it.” Push for rollover language if you anticipate spending less.
  • Who owns the buildout at lease end?
    Most tenant improvements that are permanent become property of the landlord (property owner) after lease termination. Removable items purchased by the tenant may be taken at move-out if not explicitly written into the lease as remaining.

Email this list to your broker, general contractor, or PM today to avoid common pitfalls.

Restaurant TI Buildouts: Kitchens, Ventilation, Grease, and Why MEP Coordination Is Everything

Did you know that over 60% of failed restaurant launches are linked to overlooked buildout details in restaurant tenant improvement projects? The world of restaurant tenant improvement can be daunting—packed with industry jargon, red tape, and hidden risks that can quietly derail your dream dining space before you even open

Why Restaurant Tenant Improvement Can Make or Break Your Business

Did you know that over 60% of failed restaurant launches are linked to overlooked buildout details in restaurant tenant improvement projects?

  • Quick Definition: What Is Restaurant Tenant Improvement?
    • Restaurant tenant improvement (TI) refers to custom renovations and upgrades made to a leased restaurant space—everything from commercial kitchen installs and ventilation system upgrades to specialty finishes and electrical improvements.
  • Why Restaurant Tenant Improvement Matters for Every Tenant and Owner
    • Well-planned tenant improvement is essential to the success of any restaurant build. Overlooked MEP (mechanical, electrical, plumbing), poor ventilation, or skipping critical fire suppression system upgrades can cripple your restaurant before the first plate is served. Whether the restaurant space is a blank shell or a former dining area, what you do (or don’t do) with TI work will directly impact timelines, budgets, and compliance with health department and building codes.

restaurant tenant improvement: Modern restaurant interior under construction, with contractors and business owners reviewing blueprints in an unfinished urban restaurant space

What You’ll Learn About Restaurant TI

  • Essential steps for a successful restaurant tenant improvement project
  • How to prevent costly mistakes in restaurant build and restaurant tenant improvement
  • Practical metro realities of tenant improvements in Downtown LA and major cities
  • Critical questions to ask your general contractor (GC), property manager (PM), and landlord (LL)

Understanding Restaurant Tenant Improvement: Core Concepts and Metro Realities

Defining Restaurant Tenant Improvement in Plain English

At its core, restaurant tenant improvement is the process of customizing or transforming a leased commercial space—usually a blank shell or former restaurant—into your dream dining area. Unlike generic office TI work, restaurant spaces demand specialized attention to things like grease traps, upgraded HVAC systems, fire suppression, and robust mechanical, electrical, and plumbing (MEP) infrastructure. MEP coordination is especially critical in restaurants due to the intensity and frequency of kitchen activity.

Tenant improvement projects cover everything your business needs to pass inspection and smoothly operate: from new ventilation systems to ADA-compliant bathrooms, proper air conditioning, and efficient layout for hosts, chefs, and waitstaff. Every square foot, from kitchen install to dining room charm, counts toward your overall budget and operational success.

Restaurant Space & Restaurant Tenant: How They Shape the Improvement Project

Is your spot a quick-service concept in a bustling food court, a fine-dining retreat, or somewhere in between? Factors like lease agreement terms, existing building conditions, and property manager requirements will shape what’s possible—and what’s permitted—in your improvement project

restaurant tenant improvement: Kick-off meeting with architect, contractor, and restaurant owner in a city-view, unfinished restaurant site

Common Restaurant Build and Tenant Improvements Challenges in Metro Areas

In urban centers like DTLA and most major metros, restaurant tenant improvement projects hit unique roadblocks: limited elevator and loading dock access (especially downtown), strict noise and hours-of-work ordinances, delayed inspections due to agency backlogs, and sometimes even HVAC or electrical limitations in older commercial buildings. Understanding these metro realities upfront can help avoid project slowdowns or unexpected improvement costs. Proactive coordination with GCs and local officials ensures that your restaurant tenant improvement project navigates local hurdles without derailing your schedule or budget.

Access and logistics for moving heavy kitchen equipment, grease interceptors, or large plumbing installation parts can add hidden costs and headaches. Advance planning with your TI team—especially around city holidays or event weekends—can save major delays and reduce the risk of contractor scheduling conflicts.

Local Considerations: DTLA Access, Inspections, and Logistics for Restaurant Spaces

The lesson? Get your PM and GC to map out inspection deadlines and build them into your construction timeline from the very start

Restaurant tenants in dense city cores should budget for security, parking constraints for crews, and even limited HVAC system availability in certain aging buildings. If your space is on a high floor, factor in elevator lead times and additional coordination with neighboring tenants and property management.

Critical Systems: Kitchens, Ventilation, and Grease in Restaurant Tenant Improvement

Commercial Kitchen Layouts in Restaurant Tenant Improvement

The heart of your restaurant build is the kitchen—and restaurant tenant improvement is where culinary dreams become reality (or nightmares, if details are missed). An efficient kitchen layout is a careful dance between code compliance, chef workflow, and safety. Placement of stoves, prep tables, sinks, and fire suppression systems not only affects how quickly food leaves the kitchen but also how health inspectors rate your operation.

High-traffic restaurant spaces need wide aisles, non-slip surfaces, and cleanable finishes for health and fire safety. Consider futureproofing: plan space and electrical loads for additional appliances, smart dishwashers, or specialty cook lines. Proper coordination with architects and engineers on kitchen layout—not just aesthetics but true back-of-house efficiency—leads to smoother operations and fewer surprises when you’re ready to open your doors.

restaurant tenant improvement: Chef and engineers overseeing installation of kitchen equipment and visible ductwork in a new commercial kitchen

Ventilation and Grease Systems: Non-Negotiables for Restaurant Build Success

Ventilation system design in restaurant tenant improvements is both science and necessity. Sizing and routing of ducts, hoods, and exhaust fans is crucial for removing excess heat, smoke, and grease-laden vapors—especially around fryers and grills. Improper ventilation can trigger repeated health and building department failures and create unsafe conditions for staff and customers. Don’t cut corners here: make sure plans address grease trap requirements, fire-rated ductwork, and accessible maintenance zones.

Local municipalities require robust grease management, including interceptors (aka grease traps) that meet strict city and state environmental standards. Grease buildup in plumbing can lead to costly shutdowns, fines, or even permanent closure if not handled right at the TI phase. Savvy restaurant owners invest in quality, code-compliant ventilation systems and grease management because downtime here can cripple business before you ever reach profitability.

Health, Fire, and Code Inspections: Navigating Restaurant Build Red Tape

Every TI project means running a gauntlet of inspections: health department, fire marshal, building code, and sometimes separate utility reviews for electrical system upgrades and HVAC. Each agency has its own requirements, forms, and inspection windows—miss one, and opening dates slip fast. Documentation is your ally: keep all as-builts, permits, checklists, and approvals organized to quickly resolve inspection punch lists.

Many failed restaurants never open due to missed or delayed approvals. Empower your GC or project manager to “own” inspection tracking, and insist on regular updates. Always schedule pre-final walk-throughs with code officials and address red flags before final inspection day. A penny saved on paperwork or plumbing installation can cost a fortune in delays or forced re-work if not handled correctly.

MEP Coordination: The Hidden Engine of Restaurant Tenant Improvement Success

What Is MEP and Why Does It Matter in Restaurant Tenant Improvements?

MEP stands for Mechanical, Electrical, and Plumbing—the backbone of every restaurant build. While finishes and décor catch the eye, MEP systems are the engine that keeps your restaurant safe, efficient, and compliant. In tenant improvements, MEP is make-or-break: undersized HVAC systems, badly routed electrical circuits, or plumbing missteps can torpedo opening timelines and sink improvement costs. Think of MEP as the hidden web connecting your kitchen, dining room, and utility spaces into a functioning whole.

Upgrading or retrofitting MEP in older restaurant spaces or blank commercial spaces often means coordinating trades, city inspectors, and sometimes even negotiating rights with the landlord. Early MEP planning ensures code compliance, avoids dangerous overlaps (like HVAC next to fire suppression or grease lines), and helps contain tenant improvement costs before construction begins.

restaurant tenant improvement: MEP specialists consulting diagrams and blueprints in a backroom office of an unfinished restaurant

Coordination Tips: Ensuring Mechanical, Electrical, and Plumbing Work Together in Your Restaurant Tenant Improvement Project

Integrating MEP trades isn’t just about scheduling; it’s about total project orchestration. The best results come from “pull planning”—holding joint meetings with your GC, MEP subs, architect, and landlord or PM. Map out all known conflict zones where air conditioning ducts, electrical wiring, and water or gas lines might compete for limited wall or ceiling space. In major metros, sequencing becomes vital: you might only get after-hours access for risers or require special coordination for utility shutdowns.

Double-check all mechanical, electrical, and plumbing drawings against site conditions. Opening ceilings or floors mid-construction is a costly fix if something is missed. Make your project team walk the site before drywall goes up. Good MEP coordination is the surest insurance against cascading delays, failed inspections, and surging tenant improvement costs.

“If MEP isn’t right, nothing else works. You can’t cook, chill, or open your doors.” – Commercial GC

Step-by-Step Guide: Planning and Managing Your Restaurant Tenant Improvement Project

  1. Step 1: Scoping the Restaurant Space and Defining Your Vision
    • Meet with your team to clarify the type of restaurant, service model, and operational requirements. Document your menu, peak staffing, and tech needs. The more specifics you bring to architects and brokers up front, the less re-design you’ll face later.
  2. Step 2: Assembling Your Restaurant Tenant Improvement Team (GC, Architect, Engineer, Brokers)
    • Choose professionals with extensive experience in restaurant build and improvements—ideally those who know local building codes and have a track record in high-traffic restaurant spaces. Ask for references and examples of past TI work in similar commercial spaces.
  3. Step 3: Design, Budgeting, and Permits for Tenant Improvements
    • Get detailed drawings and specify all MEP requirements. Review permit lead times (can stretch 4–12 weeks in busy cities!). Build in contingency for surprise demolition finds and utility upgrades. Discuss tenant improvement allowance terms with your broker and landlord before breaking ground.
  4. Step 4: Construction Timeline and Restaurant Build Milestones
    • Create a project schedule from start to finish with major milestones like kitchen install, rough plumbing inspection, and dining area finishes. Assign clear responsibility for inspection scheduling, coordination with utility providers, and resolution of unforeseen issues as the project progresses.

restaurant tenant improvement: Project manager and workers inspecting a partially completed restaurant dining room during renovation

  1. Step 5: Inspections, Approvals, and Punch Lists
    • As construction wraps up, coordinate all final inspections. Prepare a punch list for any outstanding items—especially those flagged by the fire marshal, health department, or building inspector. Get all approvals in writing before scheduling soft openings or staff training.
  • Checklist: Major Red Flags in Any Restaurant Tenant Improvement Project
    • Unclear MEP plans or unverified site conditions
    • Permits “in process” but not approved
    • Landlord unclear on scope or responsibilities
    • Equipment that won’t fit through entryways/elevators
    • Change orders not signed off in writing

Table: Restaurant Tenant Improvement Costs at a Glance

Region Kitchen Sq Ft MEP Costs Typical Permitting Fees Common Surprises Typical TI Allowance
Downtown LA 750–1200 $75K–$250K $6K–$16K Elevator/after-hours access, delayed inspections $30–$60/sq ft
San Francisco 600–1100 $80K–$300K $7K–$18K Permits, seismic upgrades, utility coordination $35–$55/sq ft
New York City 500–1000 $90K–$350K $8K–$20K Union labor, after-hours delivery, agency signoffs $40–$80/sq ft
Suburban/Small City 600–1000 $50K–$150K $4K–$10K Long lead HVAC/plumbing, limited inspections $20–$35/sq ft
  • What is a typical tenant improvement allowance?
    • Tenant improvement allowance is a per-square-foot amount the landlord contributes to your buildout, generally between $30–$60 per square foot—but always check the terms in your lease agreement.

Lessons Learned and What to Ask Your GC, PM, and Landlord

  • Common Problems in Restaurant Tenant Improvement Projects (And How to Avoid Them):
    • Missed or incorrect MEP coordination causing construction rework
    • Permitting delays leading to lost time and higher restaurant build costs
    • Designs that forget service flow, code compliance, or grease management
    • Surprises in older restaurant spaces: hidden plumbing or electrical needs
    • Poor communication between tenant, GC, and landlord during improvement project
  • Top Questions to Ask Before Starting a Restaurant Tenant Improvement:
    • Does my GC have extensive experience with restaurant builds in this metro?
    • When do MEP subs get involved, and who oversees coordination?
    • What’s the real lead time for permits and inspections in this city?
    • How is TI allowance calculated and reimbursed under my lease agreement?
    • What are the red flags specific to this restaurant space or building?

restaurant tenant improvement: Experienced restaurant owner and GC identifying red-flag issues in an unfinished site

FAQ: Restaurant Tenant Improvement

What is the 30 30 30 rule for restaurants?

  • Answer: The 30/30/30 rule refers to allocating 30% of revenue to cost of goods sold, 30% to labor, and 30% to occupancy and other operating expenses. In the context of restaurant tenant improvement, understanding this rule helps with budgeting during the improvement project.

What is an example of a tenant improvement?

  • Answer: Installing a new commercial kitchen, upgrading grease traps, and reconfiguring ventilation systems are common tenant improvement examples in restaurant spaces.

What are the 5 P’s of service in restaurants?

  • Answer: The 5 Ps typically stand for Product, People, Place, Promotion, and Price. For restaurant tenant improvement, ‘Place’ and ‘People’ matter most: the space needs to align with staff workflow and customer experience.

What is a typical tenant improvement allowance?

  • Answer: Tenant improvement allowances vary but can range from $30–$60 per square foot for restaurant spaces. Always confirm terms with your broker and landlord.

Restaurant TI Essentials

  • What is included in a typical restaurant tenant improvement?
    • A typical restaurant tenant improvement includes kitchen and bar buildout, dining room finishes, mechanical, electrical, and plumbing upgrades, ventilation and grease systems, ADA restrooms, and code-compliant fire suppression system installations.
  • How long does a restaurant build take from lease signing to opening?
    • From lease signing to opening, a full restaurant build-out usually takes 5–9 months. Delays in permits, inspections, and custom equipment can extend these timelines, especially in busy city centers.
  • How do MEP systems impact tenant improvement costs?
    • MEP systems are often the largest line item in restaurant tenant improvement costs. They drive budget for HVAC, plumbing installation, fire suppression, and electrical system upgrades. Coordination mistakes or late design changes can significantly increase total improvement costs.

Key Takeaways and Success Factors

  • Restaurant tenant improvement is a complex but crucial phase for any food business. Missing details in MEP or buildout scope can sink a project before you even open.
  • Permitting, MEP coordination, and strong communication between GC, PM, and landlord are the real drivers of cost and schedule success.
  • Understand metro realities: DTLA and other big-city environments add unique access, scheduling, and inspection headaches. Plan with these in mind.
  • Get everything in writing: scope, schedule, allowance amounts, and change orders. Clarity protects your investment.
  • Start every project with a solid checklist, an experienced TI team, and a keen focus on must-ask questions for your specific restaurant space.


How to Build a Tenant Improvement Schedule: Milestones, Long-Lead Items, and the ‘No Surprises’ Plan

Did you know: More than 70% of commercial tenant improvement projects face delays due to overlooked long-lead items or unclear scheduling? Understanding a tenant improvement schedule isn’t just helpful—it’s critical for avoiding costly surprises.

What To Learn About the Tenant Improvement Schedule

  • A clear definition of a tenant improvement schedule and why it matters for your tenancy, lease, and business plan.
  • How to break down the step-by-step improvement process to achieve a successful tenant improvement project.
  • Common long-lead items, red flags, and what can derail your improvement project.
  • Key questions to ask your GC/PM/landlord, and how to navigate the local realities of commercial real estate.

Definition and Core Concepts

What is a Tenant Improvement Schedule?

A tenant improvement schedule is the master project timeline that charts every step in transforming an existing space to meet your specific business requirements. This schedule outlines the entire improvement process—from initial design and permitting to final move-in—and details all milestones, deadlines, and responsibilities for a tenant improvement project. Typical components include the project start date, key milestones (like finalizing plans, submitting building permits, and physical construction), and critical path items such as long-lead materials. This schedule forms the backbone of a successful tenant improvement by coordinating general contractors, property managers, and tenants, making sure everyone is working toward the same goal. Without a clear tenant improvement schedule, even the best improvement project can stall due to unanticipated hiccups.

In real estate, particularly in commercial space, the tenant improvement schedule is not just an organizational tool; it’s a risk management asset. By defining a structured timeline, establishing check-ins, and listing all long-lead items, you prevent headaches like extra rent payments, missed business openings, or costly scope of work changes. This is especially true in urban markets where local building requirements, permitting delays, or after-hours access can derail the best-laid plans. The tenant improvement schedule is where timelines, budgets, leases, and real-world build logistics converge—making it the single most important document for a successful tenant improvement project.

tenant improvement schedule being discussed by a modern office team planning a tenant improvement project with architectural blueprints and professionals collaborating at a table

  • Quick definition and typical components—how it fits into the improvement process and tenant improvement project lifecycle.

Why Does the Tenant Improvement Schedule Matter?

Your tenant improvement schedule directly shapes your project’s success and your total cost of occupancy. The schedule guides every detail: it allocates your improvement allowance (the funds set aside in your lease agreement for making the space your own), impacts rent-free periods, and even dictates when your rent kicks in. If the schedule is underestimated or vague, you could see cost overruns, delays that consume your improvement allowance, or worse—missed lease commencement dates that hit your finances hard. That’s why an accurate schedule is essential for controlling expenses, protecting your budget, and delivering a successful tenant improvement experience.

For tenants, property managers, and brokers in commercial real estate, understanding how schedule, improvement allowance, and lease terms interact is non-negotiable. Tight timelines and busy metro areas create stress points. If a long-lead item (like custom HVAC units or specialty lighting) is missed, it can bottleneck your entire schedule, impacting the project timeline and potentially triggering penalties in your lease agreement. Getting clear on your tenant improvement schedule, and building in a “no surprises” buffer, is one of the best ways to ensure your tenant improvements support your long-term business goals.

  • Impact on tenant improvements, budgeting your improvement allowance, and ensuring a successful tenant improvement experience.

Key Elements of a Tenant Improvement Schedule

Milestones in the Tenant Improvement Process

A tenant improvement schedule is built around major milestones that move your project from “dream” to “move-in-ready.” Key phases typically include space planning, architectural design, permitting, construction buildout, inspections, and, finally, transition to occupancy. Space planning sets the design vision, while detailed design decisions must account for building code and real estate regulations. Next, building permit submission and approval can involve weeks, especially in urban settings with large project volumes. The construction phase turns documents into reality—framing, electrical, plumbing, finishes—while inspections confirm work meets local codes and your expectations.

Each milestone in the timeline is a checkpoint that helps keep your tenant improvement project on course. Delays at any stage can ripple through the schedule, impacting the move-in date and your lease term. That’s why proactive communication, defined roles, and a realistic milestone calendar are crucial. For example, in busy districts like DTLA, scheduling city inspections or access to freight elevators for materials delivery can add weeks to your project if not properly coordinated in the improvement process.

project manager reviewing a tenant improvement schedule Gantt chart with milestones and color-coded phases for a successful tenant improvement project

  • Major phases (space planning, design, permitting, buildout, inspections, move-in) in improvement project management.

Long-Lead Items and How They Impact Your Tenant Improvement Project

Long-lead items are materials or equipment with extended order or fabrication times, such as specialty lighting, high-efficiency HVAC units, custom doors, or imported finishes. These are notorious for derailing an otherwise well-planned tenant improvement process. If not identified and ordered early, long-lead items can burn through your improvement allowance due to rush shipping fees or trigger schedule overruns that affect your lease start date. For example, waiting on custom millwork or imported tiles may pause other trades, causing a domino effect on the entire project timeline.

In commercial real estate, especially in metro areas, procurement lead times can be unpredictable due to market supply chain fluctuations or unique building requirements. Overlooking one long-lead item can push your move-in back, force temporary fixes, or even lead to failed inspections if required features aren’t installed on time. Working with your general contractor and property manager at project kickoff to identify, prioritize, and order these items as soon as possible is a cornerstone of no-surprises scheduling.

  • What constitutes a long-lead item, how delays ripple through your tenant improvement allowance and lease term.
Sample Tenant Improvement Schedule Milestones Table
Phase Typical Duration Long-Lead Items Common Delays
Space Planning & Design 2-4 weeks Design approvals, specialty materials Late design input, scope changes
Permitting 3-8 weeks Custom plans, city review Backlog at local building office
Construction Buildout 6-14 weeks HVAC, electrical gear, fixtures Late delivery, code issues
Inspections 1-2 weeks None (but work must be complete) Failed inspections, rework required
Move-In & Punch List 1 week Punch list repairs, final clean Last-minute fixes, cleaning delays

‘No Surprises’ Planning: Step-by-Step Guide to Building Your Tenant Improvement Schedule

Step 1: Confirm Tenant Improvement Allowance and Lease Agreement Terms

Before you break ground on your tenant improvement project, scrutinize your lease agreement for all details related to your tenant improvement allowance—how much money is available, what counts as a qualified improvement, and when funds are disbursed. Different lease terms may tie your improvement schedule directly to rent commencement or give you a window for “free rent” prior to move-in. It’s critical to align your schedule with your business plan, lease term, and adequate funding, so you’re not left holding the bag for overages. Engaging your broker, attorney, and property manager early ensures that your budget and timeline match local reality, protecting you from unpleasant surprises down the road.

Don’t hesitate to ask for a written summary of your improvement allowance and any requirements for reimbursement or cost tracking. Make this step the foundation of “no-surprises” planning—set practical deadlines, know your lease terms, and keep everything in writing. In high-demand markets like DTLA, even well-negotiated improvement allowances can evaporate quickly if the schedule slips, so have your team confirm what’s required for a successful tenant improvement.

  • Clarify your lease terms, review improvement allowance, and set realistic schedules aligned with commercial real estate realities.

Step 2: Collaborate with Your GC, Property Manager, and Broker

Every successful tenant improvement requires a strong, aligned project team—your general contractor (GC), property manager, and commercial broker should all be clear on the schedule, improvement allowance, and roles. Best practice: hold a kickoff meeting where expectations, communication protocols, and a draft tenant improvement schedule are shared. Identifying key decision points and who has authority (tenant, landlord, or GC) keeps the process nimble and reduces costly back-and-forth. Document all communications and schedule check-ins to catch red flags early.

In commercial real estate, weak communication is the main cause of missed milestones, delayed permits, and surprise change orders. Whether you’re dealing with complex property owner rules, local building officials, or multiple project phases, consider circulating weekly updates and using collaborative project-management tools. This keeps your improvement process transparent and everyone accountable for hitting your project timeline.

  • Best practices for communication, setting expectations, and assembling the right improvement project team.

Step 3: Map Out Permitting and Inspections for Your Tenant Improvement Project

Every commercial real estate market has its quirks—especially when it comes to building codes, local building reviews, and city inspections. Permitting can tank a tenant improvement schedule if you’re not prepared. Learn the specific approval process for your building and city; submit permit documents that reference applicable building code sections, and understand approval timelines in your area. In downtown markets, plan for backlogs—major metro offices can take weeks or months to approve a building permit. Account for multiple inspection phases, and factor them into your project timeline.

Talk to your GC and property manager about who’s responsible for permit submission and follow-up. Missed or delayed permits are among the top causes of project slowdowns, so add extra time to your schedule just in case. Always confirm if your project needs sign-off by fire, elevator, or health inspectors—each can impact your move-in date and lease term.

  • Building codes, local building permit requirements, approval timelines for commercial real estate in metro areas (e.g., DTLA).

Step 4: Identify Long-Lead Items Early in the Tenant Improvement Process

project coordinator examining long-lead items for a tenant improvement project in a busy warehouse with contractors and industrial supplies

Proactive ordering of long-lead materials—like specialty doors, elevators, dedicated electrical gear, or imported finishes—is a lifesaver for your tenant improvement schedule. As soon as your improvement plans are finalized, request that your general contractor or project manager provide a list of items with long procurement times and confirm estimated delivery windows. Many successful tenant improvement projects use “early release” or advanced order strategies to secure critical items before demolition even begins.

Develop the habit of reviewing product submittals, shop drawings, and delivery commitments with your GC weekly. Doing so helps you spot potential bottlenecks and allows for timely substitutions if a supplier falters. Remember, in commercial real estate, a single missed long-lead item can keep your team off-site for weeks and lead to costly re-sequencing or overtime charges, all of which eat away at your improvement allowance.

  • Examples of long-lead materials, fixtures, equipment; how to request early release/orders.

Step 5: Account for Metro & Building-Specific Logistics

building engineers and property managers coordinating tenant improvement logistics at a busy metropolitan high-rise commercial real estate site

Urban commercial real estate projects—especially in dense metros like DTLA—present unique logistical challenges for your tenant improvement schedule. Building access is highly regulated: after-hours work, elevator scheduling, loading dock reservations, and city-imposed noise ordinances can create delays. Always check with the property manager and GC about project rules, special requirements for moving materials, or restrictions during holidays or rush hours.

Details like scheduling city inspections, arranging for debris removal, or navigating basement-level utility spaces can add unexpected days or weeks to your improvement process. Build extra time into your schedule for coordination with the building’s operational staff, security procedures, or parking permits. Being proactive about these building-specific realities protects your move-in date and helps keep your improvement allowance from being wasted on last-minute overtime or change orders.

  • After-hours access, elevator scheduling, city inspections, and how urban commercial real estate details impact your improvement schedule.

Step 6: Set Check-In Points and Adjustments for a Successful Tenant Improvement

construction foreman monitoring tenant improvement progress at a partially finished office space using a tablet and collaborating with team members

No tenant improvement schedule is perfect from day one—project realities mean adjustments are part of the process. That’s why scheduling regular check-in points with your GC, broker, property manager, and even the property owner is essential. Use these times to review progress against the schedule, catch surprises before they escalate, and adapt as needed to keep your project within the improvement allowance and lease term.

Typical check-ins happen at major milestones: after demolition, during inspection sign-offs, and as you approach substantial completion and start your “punch list” walk-through. Document all agreed adjustments and communicate any changes in writing. This creates a shared record, helps resolve disputes, and supports a successful tenant improvement experience from start to finish.

  • How to monitor job progress, adapt to changes, and keep the project within the improvement allowance and overall lease term.

Common Pitfalls in Tenant Improvement Schedules—And How to Avoid Them

  • Missed milestone deadlines: Plan realistic timelines, require weekly updates, and address issues as soon as they arise.
  • Poor communication between tenant, GC, and landlord: Establish regular meetings and document all changes to the schedule.
  • Surprise building code violations or permit delays: Have plans reviewed by an expert before submitting for permits.
  • Underestimating long-lead item delays: Confirm long-lead item lists and order early; build flexibility into the schedule.
  • Inaccurate improvement allowance budgeting: Track spending closely and clarify reimbursement procedures up front.
  • Overlooking lease agreement requirements: Review the lease for all TI clauses, deadlines, and move-in triggers.

“No two tenant improvement projects are ever the same, especially in complex urban markets. Meticulous planning and open communication are your best insurance.” – Senior Project Manager, DTLA

Questions to Ask Your GC/PM/Landlord Before Signing Off on Your Tenant Improvement Schedule

  • What are the known long-lead items for my improvement project?
  • Who is responsible for managing building permit submissions and deadlines?
  • How is the improvement allowance disbursed throughout the tenant improvement process?
  • What happens if delays extend past the scheduled move-in?
  • Are there special after-hours rules or logistics for this commercial real estate building?

FAQ: Tenant Improvement Schedules

Are leasehold improvements 15 year or 39 year?

  • The IRS generally allows depreciation of leasehold improvements over 15 years if certain requirements are met; otherwise, the default is often 39 years. Consult your CPA to determine your specific tenant improvement project’s eligibility.

What is a reasonable TI?

  • A reasonable tenant improvement allowance varies by market, building class, and tenant needs. National averages range from $30-$80 per square foot, but local commercial real estate dynamics and lease terms have a significant impact.

What does TI mean in project management?

  • “TI” in project management refers to tenant improvement, representing alterations to building interiors to suit the needs of incoming tenants. TI can refer to both the physical improvement process and the allocated improvement allowance in the lease agreement.

What is a TIA reimbursement?

  • TIA stands for Tenant Improvement Allowance. TIA reimbursement refers to landlords paying tenants back (or paying directly) for qualified improvement project costs up to the agreed allowance, as defined in the lease agreement.

Pro Tips for a Successful Tenant Improvement Schedule

  • Always confirm the improvement allowance and approved scope before work starts
  • Have your improvement project plans reviewed for building code compliance
  • Build in extra time for building permit reviews in busy metro markets
  • Use checklists for each phase of the tenant improvement process
  • Keep all communication in writing for your records

Understanding Your TI Schedule

  • How does the tenant improvement schedule impact rent commencement and lease term? The schedule sets your timeline for project completion, which in turn determines when rent obligation starts according to your lease agreement. If the project is delayed, you may face carrying costs or negotiate extensions, depending on your landlord.
  • Who owns the improvements after project completion? In most leases, tenant improvements become the property of the landlord upon installation, but exact terms vary. Review your lease or consult your broker to clarify ownership after project wrap-up.
  • Can you extend a tenant improvement allowance or project deadline? Extensions are sometimes negotiable, but should be documented as a formal lease amendment. Involve your property manager and legal counsel if schedule changes are needed.

A tenant improvement schedule is critical to a successful tenant improvement project. Early planning, clear roles, and adapting to local requirements can help tenants avoid costly schedule overruns.

Navigating the permit process in DTLA

A practical TI guide for tenants, owners, and project teams who don’t want permitting to eat the schedule.

Downtown Los Angeles is a different animal. You can have a clean lease, a solid design, and a great contractor… and still lose weeks because somebody didn’t think through building access, plan check lane selection, or the “one missing document” that triggers corrections.

This article is your field guide: how the City side works, what DTLA adds to the mix, and how to keep your TI moving without living at the counter.


The DTLA permit reality: three clocks are always running

On a TI, you’re managing three clocks at once:

  1. Lease clock (rent starts / free rent ends / opening date)

  2. Permit clock (submittal → plan check → corrections → approval → issuance)

  3. Construction clock (procurement → build → inspections → final signoff)

If you treat permitting like “paperwork we’ll do later,” DTLA will punish you.


Step 1: Know what “needs a permit” (before you design the wrong thing)

In Los Angeles, LADBS is the hub for permits and inspections. Most TI scopes touch multiple permit types (building + MEP), and if you guess wrong you’ll bounce between reviewers.

LADBS’s plan review/permitting page lays out the permit categories (Building, Electrical, Mechanical HVAC, Plumbing, etc.) and the plan review pathways you’ll likely fall under.

Rule of thumb:

  • Cosmetic-only work can sometimes stay simple.

  • The moment you’re moving walls, changing exiting, touching HVAC/electrical/plumbing, changing use, or doing anything accessibility-related—assume you’re in real permit territory.


Step 2: Pick the right “lane” (this is where schedules are won or lost)

LADBS doesn’t handle every project the same way. They offer different plan review processes depending on complexity.

The big three lanes you’ll hear about

1) Counter Plan Check (fast lane for simpler plan-check projects)

  • LADBS describes this as same-day review for smaller projects, typically reviewed in about 45–60 minutes, and available at Metro (Downtown) and other offices.
    This is not for every TI, but when your scope qualifies, it can save serious time.

2) Regular Plan Check (complex projects)

  • For larger/complex projects, LADBS notes plans are reviewed and returned within weeks depending on workload, and you can expedite with 50% more of the plan check fee.
    This lane is common for multi-floor, more technical TIs, or anything that triggers deeper review.

3) Electronic plan review via ePlanLA (how you’ll submit most real TIs now)

  • LADBS states ePlanLA is their electronic plan review system and that the plan check process—including verification and permit issuance—can be done electronically.

  • ePlanLA uses an Angeleno Account for login and tracking.

Practical DTLA advice:
Before your architect finishes a full set, ask: “Which lane is this likely to fall into—Counter, Expanded Counter, or Regular?” That one question changes how you schedule design, submittals, and your opening date.


Step 3: Do the “DTLA building reality check” before you submit

DTLA delays often aren’t “city delays.” They’re building constraints you discover too late.

Before submittal, confirm these with the building/PM:

  • Access windows (after-hours rules, weekend work, noise restrictions)

  • Freight elevator booking process and limitations

  • Loading / staging (where materials can land, how long a truck can sit)

  • Security protocols (badges, escorts, sign-in requirements)

  • Base-building capacity (electrical service, HVAC, roof equipment rules)

  • Fire/life safety coordination (especially if any work touches egress, alarms, sprinklers)

This stuff doesn’t show up on pretty renderings, but it shows up in your schedule and change orders.


Step 4: Submit correctly (and make plan check easier to approve)

For most TI projects, you’ll use ePlanLA to submit drawings and documents electronically.

What “good submittal” looks like:

  • Drawings are coordinated (architectural matches MEP assumptions)

  • Clear scope narrative (what you’re doing and what you’re not)

  • Complete code notes (occupancy/use, exiting approach, accessibility triggers)

  • Equipment schedules where needed (HVAC, lighting, etc.)

  • Details that match the existing building conditions (or clearly state “verify in field” with allowances)

Why this matters:
Most “permit delays” are really “correction cycles.” Every correction round is time.


Step 5: Expect corrections (and treat them like a project phase)

Corrections aren’t a failure—they’re normal. The problem is when the team treats corrections like an annoying email instead of a managed phase.

How to keep corrections from becoming a black hole:

  • Assign one owner (GC PM or architect PM) to track every comment

  • Respond in a single consolidated package (avoid piecemeal resubmittals)

  • Keep a “decision log” for anything that changes scope/cost

  • Protect the opening date by prioritizing “long-lead” approvals


Step 6: Pull permits + start work… but don’t bury anything without inspection

LADBS is very clear: you must have the required permits before requesting inspections, and you should call for inspection before you cover or conceal work.

They also note inspections happen in succession and the work isn’t approved until it’s inspected and accepted.

In plain English: don’t close the drywall until the rough inspections are done.


Step 7: Inspections in LA (how scheduling actually works)

When you’re ready, LADBS says you can request inspections online or by calling 311 (or the alternate number when outside LA).

They also list what to have on-site during inspection:

  • copy of permit

  • approved plans (if plan review required)

  • building card (for building permits)

  • equipment needed (ladder, etc.)

DTLA pro tip:
Plan inspections around building access and elevator reservations. In DTLA, “the inspector is coming” isn’t enough—you also need “the building will let them in.”


A simple DTLA TI “no surprises” checklist

Use this before you sign a construction contract:

City / Plan Check

  • ✅ Confirm which plan check lane you’re likely in (counter vs regular)

  • ✅ Set up ePlanLA / Angeleno access early

  • ✅ Decide if expediting is worth it for your timeline

Building / DTLA logistics

  • ✅ Confirm work hours + noise rules

  • ✅ Freight elevator scheduling process

  • ✅ Loading/staging plan

  • ✅ Security access plan for workers + inspectors

  • ✅ Building engineer coordination on MEP tie-ins

Construction / Inspections

  • ✅ Rough inspection sequencing mapped (don’t conceal work early)

  • ✅ Inspection request plan (online / 311)

  • ✅ On-site documents ready for inspector


The bottom line

In DTLA, the permit process isn’t just “submit and wait.” It’s a managed workflow:

Pick the right lane → submit clean → respond fast to corrections → coordinate inspections with building realities.

Do that, and you’re not just “getting permits.” You’re protecting your opening date.

Medical Office Tenant Improvements: Cleanable Finishes, Privacy, and Code-Driven Design Choices

Did you know? Over 80% of medical real estate buildouts exceed budget or schedule due to overlooked code and finish requirements

Medical Office Tenant Improvement: Why It Matters More Than Ever

Medical office tenant improvement is not a luxury—it’s a necessity in today’s healthcare landscape. With rising patient volumes, new technology, privacy expectations, and infection control requirements, medical office spaces are under more scrutiny than ever. Unlike traditional office space, medical users must prioritize functionality, safety, and code-compliance down to every surface, wall, and door. For care providers, brokers, and building owners, this means greater attention to detail on everything from cleanable finishes to specialized HVAC.

Regulatory bodies such as OSHA, the ADA, and HIPAA have heightened standards since the COVID-19 pandemic, making compliance a core concern for medical tenants. Build-out projects that overlook code-driven upgrades—like antimicrobial surfaces, negative pressure rooms, or acoustic privacy—risk expensive retrofits, inspection failures, and even patient safety issues. Add local realities, like Downtown LA’s strict permitting and after-hours access, and it’s clear: proper tenant improvements can directly impact a practice’s bottom line, reputation, and ability to provide medical services. Whether for an urgent care, dental office, or specialty care center, designing for today means planning for tomorrow’s standards—and costs.

“Over 80% of medical real estate buildouts exceed budget or schedule due to overlooked code and finish requirements.”

Understanding Medical Office Tenant Improvement in Changing Healthcare Real Estate

  • Quick Definition: What is Medical Office Tenant Improvement?

Medical office tenant improvement (TI) refers to the customized renovations a landlord or tenant makes to adapt generic commercial or office space into fully functional healthcare environments. This includes building exam rooms, ADA restrooms, enhanced plumbing, specialty electrical, and above all, compliance with city and healthcare codes. It goes well beyond fresh paint—every material choice, from cleanable wall finishes to privacy doors and lighting, is driven by patient safety and regulatory needs, not just design trends.

Bright modern medical office interior showing medical office tenant improvement with cleanable finishes and staff interacting.

  • Key Context: Medical Office vs. General Office Space – Cleanability, Privacy, and Compliance Needs

Traditional office tenants focus on aesthetics and open plans, but medical space users must address infection prevention, acoustic privacy, and accessibility. Whether it’s exam rooms in a busy care center or an urgent care’s waiting area, the difference lies in robust surfaces (antimicrobial, non-porous), specialized ventilation, HIPAA-complaint layouts, and city-driven paperwork. The stakes are higher—mistakes cost more, and shortcuts can risk patient wellbeing.

What You’ll Learn About Medical Office Tenant Improvement

  • The essential medical tenant improvement steps and why they matter
  • Cleanable finishes, privacy options, and compliance: what these terms mean for your office space
  • Real-world cost factors: TI allowances, reimbursable expenses, and often-missed details
  • Checklists for planning, avoiding common pitfalls, and questions to ask your general contractor or property manager

Decoding Medical Office Tenant Improvement: Key Codes, Standards, and Trends

Privacy and Compliance: The Driving Forces of Medical Office Space Design

  • HIPAA/ADA and State Codes Every Medical Tenant Should Know

For any medical office tenant improvement, HIPAA (Health Insurance Portability and Accountability Act) and the ADA (Americans with Disabilities Act) are non-negotiables. HIPAA mandates sound privacy—which means exam rooms, waiting areas, and reception desks must offer protection against conversations being overheard. The ADA ensures full accessibility via clear paths, compliant restrooms, and accessible counters for patients and providers with disabilities. Each state and city (especially in medical-rich markets like Los Angeles) adds its own construction, fire, ventilation, and seismic codes. Overlooking any of these requirements could slow approvals, inflate costs, or even halt operations.

  • Cleanable Materials: From Surfaces to HVAC—What Stands Up to Real Clinical Use?

Cleanability is at the heart of every medical office renovation. Typical upgrades include vinyl walls, coved flooring (for “mop-up” edges), and non-porous solid surfaces. Modern HVAC must support frequent air exchanges (sometimes negative pressure for infectious disease control), while high-traffic zones demand antimicrobial coatings. Medical tenants should look for surfaces and finishes rated for repeated cleaning with harsh disinfectants—choices that keep providers, staff, and patients safe while meeting inspection standards.

Detail of antimicrobial surface highlighting cleanable finishes for medical office tenant improvement.

  • Metro Realities: Permitting, Approvals, and Unique Downtown LA Constraints

Urban markets, like Downtown LA, present unique hurdles for medical tenant improvements. Expect dense regulatory oversight, permit bottlenecks, and strict inspection windows. After-hours construction may be needed to avoid disrupting care centers or neighboring medical offices, and logistics can be tricky due to tight loading zones or minimal on-site storage. Factor longer lead times for specialty medical equipment, city approvals, and site access—especially if your office building shares space with other healthcare providers or office tenants.

Step-by-Step: Planning Your Medical Office Tenant Improvement

Initial Assessment: What Medical Tenants Must Audit Before Signing

  1. Checklist: Key Elements to Review in Medical Office Space for Tenant Improvements

Before signing a lease or finalizing a space, every medical office tenant should complete a detailed audit. Inspect whether the base building’s electrical, HVAC, plumbing, and restroom infrastructure meets medical-grade requirements. Verify that the landlord’s “as-is” condition allows for private exam rooms, ADA access, specialty IT wiring, and upgraded ventilation systems, all while considering the needs of your specific medical practice. Early assessments prevent expensive changes later—and ensure that TI allowances align with actual project scope.

Buildout Process Timeline and Lead Times in Medical Real Estate

  • Access, Logistics, and After-Hours Restrictions in Busy Metro Medical Tenant Locations

Medical office tenant improvements rarely happen overnight. Factor at least 12–20 weeks from permit approval to move-in, plus time for city reviews, value engineering, and specialty inspections. In busy or multi-tenant medical buildings, logistical hurdles—like limited elevator access, after-hours work requirements, and dust/noise control—can slow progress further. Proactive scheduling and regular communication with your general contractor, property manager, and city officials keep your project on track, even when unforeseen delays occur.

Medical office buildout with construction workers reviewing plans, illustrating tenant improvement logistics.

Medical Office Tenant Improvement Allowance: Navigating Your Budget

Typical Tenant Improvement Allowance: What to Expect for Medical Tenants

“Tenant improvement allowance is usually quoted per square foot, but actual needs will vary by practice type and code demands.”

Most landlords provide a tenant improvement allowance (TIA) as an incentive to attract tenants to medical office space. For medical tenants, TIA often ranges from $30 to $60 per square foot, but it’s rarely enough for complex upgrades like negative pressure rooms or lead shielding in imaging suites. Always get a detailed, line-by-line breakdown and insist on contingencies for additional code-driven requirements. Negotiate for clarity in your lease agreement on what the allowance covers—and what costs you might have to cover out-of-pocket.

Sample TI Allowance Ranges for Medical Office Space—DTLA vs. Suburban Markets
Market Low End (per sq. ft.) High End (per sq. ft.) Notes
Downtown Los Angeles $35 $60+ Higher code/construction costs, strict inspections
Suburban LA/Orange County $25 $45 Faster approvals, less complex buildouts
San Fernando Valley/Inland Empire $20 $40 Lowest cost, fewer code barriers

Comparing $40 Tenant Improvement Allowance: Real Value and Buying Power

  • What Does Tenant Improvement Cover? Must-Haves vs. Upgrades

A $40 per square foot allowance, a common benchmark, can fund basic finishes and minor reconfiguration—but for medical office space, that budget is often consumed by code requirements, exam room plumbing, ADA restrooms, and cleanable materials. “Must-haves” cover all code-mandated items like non-porous walls, patient privacy upgrades, and mechanical systems. “Upgrades” could include custom millwork, specialty lighting, or state-of-the-art acoustic doors. Medical tenants should prioritize essentials, then negotiate for landlord-supplied upgrades wherever possible, understanding that TI dollars rarely stretch far in a healthcare buildout.

Selecting Finishes for Medical Office Tenant Improvement: Cleanable and Code-Ready

  • Wall, Flooring, and Ceiling Materials: What is ‘Cleanable’ and Why It Matters for Healthcare Providers

The best medical office tenant improvements use finishes engineered for infection control. On walls and floors, choose seamless, non-absorbent materials: sheet vinyl, epoxy, or antimicrobial paint. Ceilings in exam rooms should resist moisture and allow easy cleaning. These selections directly impact patient safety, staff workflow, and compliance with healthcare provider standards. Durable, cleanable surfaces support long-term use and reduce costly downtime for repairs or maintenance.

Modern display of healthcare flooring and cleanable wall finishes used in medical office tenant improvement.

  • New Trends: Antimicrobial Surfaces, Negative Pressure, and Enhanced Privacy

Recent years have introduced that every new buildout considers trends like antimicrobial countertops, touchless doors, and negative-pressure exam rooms for infection control. Enhanced privacy, achieved through acoustic insulation and frosted glazing, is now standard in new tenant improvements. Care providers are also prioritizing more open staff workstations built with protective barriers and upgraded ventilation to safeguard both patients and teams.

  • Red Flags: Material Choices That Can Blow Your TI Allowance

Beware of encasing traditional office materials hoping to save money. Carpeting, porous wood, or anything requiring sealed grout can quickly fail inspections—or become breeding grounds for pathogens. These “value” options often result in do-overs that can break the budget. Insist on detailed drawings and samples from your general contractor before ordering finishes to avoid costly errors.

Privacy in Medical Office Tenant Improvements: Best Practices by Design

  • Acoustic Insulation, Door Hardware, and Patient Flow in Office Space

Privacy in a medical office space starts at the blueprint level. Advanced acoustic insulation in walls, solid doors with sweep bottoms, and upgraded door hardware can dramatically reduce sound transfer from exam rooms and offices. Patient and provider flow—the pathways people take between waiting areas, exam rooms, and offices—should be designed for both privacy and efficiency. This supports HIPAA compliance and builds patient trust in your facility.

  • Balancing Privacy with Staff Visibility for Care Providers

Today’s healthcare providers expect design solutions that keep sensitive patient information and conversations confidential, while also ensuring clinicians can easily support one another and monitor traffic. Thoughtful layouts use partial glass, visual cues, and sight lines, so staff remain in control without risking privacy breaches. Modern medical offices achieve this through carefully chosen door types, privacy film, and flexible workspaces.

Professional medical office hallway emphasizing privacy features in tenant improvement design.

  • ADA, HIPAA, and City-Driven Documentation for Medical Office

Finally, every tenant improvement for medical offices requires thorough documentation. Inspections for ADA compliance, HIPAA privacy partitions, and city certificates must be passed before occupancy. Maintain a digital folder of all plans, permits, and material specs to quickly address landlord, inspector, or future tenant needs down the line.

Checklist: What to Ask Your GC, PM, or Landlord About Medical Office Tenant Improvement

  1. 10 Key Questions Every Medical Tenant Should Ask About Tenant Improvements

What dollar amount is the tenant improvement allowance, and what is excluded? Will the allowance cover code-compliant exam rooms, ADA bathrooms, and specialty HVAC? How long will city permitting, approvals, and inspections take for this office building? What after-hours or weekend work is required (and who pays for it)? Are cleanable finishes and infection control upgrades included—or will these be extra? How are change orders, inspection failures, or city “redlines” handled? Can the allowance be used for medical equipment, data cabling, or exterior signage? Will I receive copies of as-built plans and compliance certificates at project close? What warranties or maintenance is included for installed finishes and equipment? Who coordinates the final walk-through and handoff for state or city health inspections?

  • Project Management Tips: Aligning Schedules, Inspections, and Medical Office Requirements

Assign a team member or advisor to track every schedule—permits, inspections, material deliveries, and occupancy deadlines. Weekly status updates with your GC or landlord, plus buffer time for unknowns, keep expensive surprises at bay. Remember: medical office tenant improvement is a team sport—one missed detail can mean costly rescheduling or rework.

People Also Ask: Medical Office Tenant Improvement FAQs

What is a typical tenant improvement allowance?

  • Answer: Typical TI allowances for medical office space range widely but average $30–$60 per square foot, depending on location, medical specialty, and negotiated terms. Know what’s included—demo, new mechanical/electrical, finishes, and compliance costs—and where you may need extra funding.

What is a $40 tenant improvement allowance?

  • Answer: A $40 TI allowance is an industry budgeting benchmark—enough for basic office updates but often insufficient for medical tenant upgrades like high-grade plumbing, lead-lined walls, or specialty compliance. Always request a detailed cost breakdown.

What is an example of a tenant improvement?

  • Answer: Examples include new exam room buildouts, ADA-compliant restroom additions, updated HVAC for infection control, custom cabinetry for healthcare providers, or new privacy partitions—all code-driven and required in most medical tenant improvements.

What does tenant improvement cover?

  • Answer: Tenant improvements cover everything from new walls, flooring, lighting, and plumbing to signage, IT/data cabling, and systems upgrades to align with medical office code and healthcare provider standards.

Lists and Red Flags: Best Practices for Medical Office Tenant Improvement

  • Best Practice List: Top 7 Success Factors in Medical Office Tenant Improvements
    • Confirm scope of work and code requirements before lease signing
    • Prioritize cleanable, durable, code-approved finishes
    • Negotiate a sufficient tenant improvement allowance for specialty needs
    • Insist on early and recurring progress walkthroughs
    • Document all change orders and approvals in writing
    • Schedule buffer time for city/health department inspections
    • Keep a digital archive of plans, permits, warranties, and compliance docs
  • Watch List: 5 Most Common Budget-Busters in Medical Office TI
    • Choosing general office materials that don’t meet health regulations
    • Skipping early code/permit review consultations
    • Underestimating lead times for specialty fixtures or equipment
    • Unexpected after-hours costs (for noise control in mixed-use buildings)
    • Rushing the final punch-list—overlooking privacy and ADA details

Sample Video Walkthrough: Medical Office Tenant Improvement Before & After

Checklist: Medical Office Tenant Improvement Questions to Email Your Broker/GC

  1. Step-by-Step Email Template: Get the Essential TI Answers Before You Commit

What is the total tenant improvement allowance and what exact improvements are included? How will you ensure all finishes/materials are code-approved and cleanable? Are architect and city submittal fees part of the allowance? What documentation will I receive for code compliance and occupancy? What’s the planned construction timeline, and who handles city scheduling? If we need after-hours work or special permits, who pays and who arranges? Is there contingency if costs exceed allowance, and how are change orders handled? How will delays affect the lease commencement or rent abatement? When and how will training for new systems (HVAC, access) be provided? Can I use part of the allowance for equipment, cabling, or external signage?

FAQs on Medical Office Tenant Improvement

  • How long do typical medical office tenant improvements take to finish? Most projects require at least 3–5 months from start to finish, accounting for design, permits, city approvals, construction, and inspections. Specialized medical space can extend this to 6 months or longer.
  • Are cleanable finishes required or just a best practice for healthcare providers? Cleanable finishes are required by most health, OSHA, and state codes for exam rooms, public spaces, and restrooms in medical office space — not just a suggestion.
  • What code changes have impacted medical tenants most in the last 5 years? COVID-era shifts brought higher ventilation rates, aggressive infection control protocols, more ADA requirements, and stricter privacy rules on new medical facility buildouts.

Key Takeaways from Medical Office Tenant Improvement

  • Factor code-driven upgrades and cleanable finishes into every planning phase
  • Review the TI allowance line by line so costs and compliance are never a guess
  • Start communications early with GCs, PMs, brokers, and city inspectors
  • Document every approval, finish, and inspection for peace of mind—and future use

Office Tenant Improvements: Layout, Power, Data, and the Hidden Decisions That Save Money Later

Startling Truth: As much as 60% of all office tenant improvement projects end up over budget due to missed details in early planning. If you’re negotiating a new office space or planning a renovation, knowing how to spot these missed details—before they balloon into expensive mistakes—can save you serious money and hassle down the road. This comprehensive guide breaks down office tenant improvement so you can ask the right questions, avoid oversights, and maximize every dollar in your buildout.


Startling Truth About Office Tenant Improvement That Every Tenant Must Know

“As much as 60% of all office tenant improvement projects end up over budget due to missed details in early planning.”

Professionals and architects reviewing blueprints for office tenant improvement in a modern renovation

Why Office Tenant Improvement Is Critical in Commercial Space Planning

Office tenant improvement isn’t just about making your space look good—it’s about making sure your new or current office works perfectly for your business requirements, both now and in the future. In commercial real estate, every detail you overlook—from power and data locations to compliance with building codes—can lead to delays, cost overruns, or even wasted space that doesn’t support your daily workflow.

Whether you’re planning modifications for open collaborative spaces or need private offices tailored to a specific business, the way you approach tenant improvements can directly affect your lease agreement, ability to scale, and even how competitive your company looks to new hires. A well-chosen layout and infrastructure create value, while poor planning can trap you in costly fixes during your lease term.

What You’ll Learn in This Office Tenant Improvement Guide

  • Plain-English definition of office tenant improvement
  • How to calculate and maximize your tenant improvement allowance
  • Step-by-step process for a tenant improvement project
  • Hidden decisions in layout, power, and data that save money long-term
  • Checklists and questions to ask your general contractor, project manager, or landlord

Fast Definitions and Key Concepts

What Is Office Tenant Improvement in Commercial Real Estate?

Business owner and architect reviewing vision board in freshly painted commercial office space before tenant improvement

Office tenant improvement refers to the modifications made to a leased commercial space to fit the needs of a specific tenant. This can include installing new walls, electrical & data cabling, lighting upgrades, HVAC modifications, flooring, ceiling, and any other customized features required by your business or industry. Unlike cosmetic upgrades, tenant improvements are usually substantial changes that align the space with your brand, safety, and operational requirements.

In the world of commercial real estate, landlords often offer tenant improvement allowances (TIAs) as an incentive for tenants to sign a lease. Understanding what counts as a tenant improvement versus what’s considered “base building” work by the property owner is crucial, as this affects who pays for what, what your allowance covers, and how you budget your project from start to finish.

Tenant Improvements vs. Landlord Work: Who Pays for What?

  • Distinguishing tenant improvements from landlord base building work
  • Improvement allowances: how they work, what they cover — and what they don’t

Most tenant improvements include changes made to the interior to fit your business requirements, while landlord work means major structural elements or core building systems. You’ll need to clarify in your lease agreement who pays for what: TIAs typically cover tenant-specific finishes, while landlords are responsible for building-wide systems. Get these details in writing to avoid disputes or uncovered costs during your improvement project.

Why Office Tenant Improvement Decisions Matter: Cost, Flexibility, and Value

Project manager and construction foreman discussing office tenant improvement over digital plans in an active build-out

Impact of Office Tenant Improvements on Lease Value and Flexibility

Every dollar spent on a strategic office tenant improvement has a ripple effect on your lease value and flexibility. Well-planned improvements not only create a workspace that fits your operational needs but can also increase the overall value and functionality of your office space by as much as 10% per square foot. This impacts negotiations, subleasing potential, and your property’s appeal in the real estate market.

“A well-planned tenant improvement project can increase your space’s value by 10% per square foot.”

Strategic tenant improvements give tenants more control over layout changes during the lease term, making it easier to adapt or expand as your team or technology needs evolve. This flexibility is critical for fast-growing companies or those navigating hybrid or open office space trends in the commercial real estate market.

Risks of Poor Planning: Top Mistakes in Tenant Improvement Projects

  • Underestimating improvement allowances
  • Ignoring building codes and permit timelines
  • Overlooking power and data needs in commercial space

Ignoring these key areas can derail your improvement project, leading to blown budgets, code violations, or even move-in delays. To avoid becoming another statistic in the “over budget” crowd, insist on detailed scopes of work, updated schedules, and robust communication throughout every stage of your project.

Step-by-Step: The Office Tenant Improvement Process

  1. Needs assessment and space planning
  2. Understanding tenant improvement allowance negotiation
  3. Design: layouts, power, and data requirements
  4. Permitting and building code compliance
  5. Construction and project management
  6. Final walk-through, punch list, and move-in

Moving successfully through each stage requires attention to detail at every checkpoint. Needs assessment means more than just thinking about headcount—it’s about how your staff works, collaborates, and uses the space on a daily basis. Understanding your improvement allowance before design work starts can help you prioritize key upgrades within budget. Successful projects balance code compliance, access logistics, and future flexibility, all while meeting milestones for construction and move-in.

Key Checkpoints and Common Red Flags in Tenant Improvement Projects

  • Ambiguous lease terms regarding improvement allowances
  • Missed code compliance deadlines in commercial real estate
  • Delays in ordering custom materials or fixtures

Don’t move forward until everyone—tenant, broker, project manager, and landlord—has a shared written scope, timeline, and cost plan. Check for “gray areas” in your lease terms around TIAs, clearly document code deadlines and inspection requirements, and order long-lead items early to avoid work stoppages or last-minute substitutions.

Layout, Power, and Data: The Hidden Office Tenant Improvement Decisions That Save Money Later

Designing for Future Flexibility in Office Space

Designer explaining flexible office tenant improvement with modular furniture and adaptable partitions

Today’s successful office tenant improvement projects are designed for what’s needed now and what’s possible later. Choosing modular furniture, movable partitions, and accessible power/data locations makes your office space easier—and cheaper—to rearrange as your business grows. By baking flexibility into your improvements, you ensure the space won’t become obsolete as technology or work styles evolve.

Ask your design team about future-proofing options: floor outlets, dropped data lines, easily reconfigurable lighting, or “plug and play” conference rooms. These cost a little more up front but can save thousands in rework at your next move, merger, or expansion.

Optimizing Electrical and Data Infrastructure for Long-Term Savings

  • Planning for technology upgrades
  • Avoiding costly electrical re-work
  • Siting server rooms and equipment closets smartly

One of the smartest moves in any office tenant improvement is getting your power and data right on the first try. Running new cabling, adding circuits, or relocating WiFi access points after the construction phase often means tearing down newly finished walls—driving costs and headaches up. Work closely with IT and facilities early in your improvement project to map out future tech upgrades, including server rooms, closet access, and WiFi coverage.

“The cheapest time to upgrade your power and data is during initial tenant improvements, not after you’re already moved in.”

Siting server rooms, backup generators, and AV equipment in smart, accessible locations reduces downtime and prevents expensive electrical re-work. These decisions may seem small now, but they unlock savings—and productivity—down the line.

Building Code Surprises: Compliance, Inspections, and Local Logistics

Every office tenant improvement project faces local and state building codes, fire and ADA compliance, and green construction rules—especially in major metros like Los Angeles. Failing to budget for required code upgrades, missed inspection deadlines, or “hidden” ADA fixes can stop your project in its tracks. Engage your GC and landlord early about local compliance rules; document all required permits, and track inspection schedules to minimize surprises.

Even experienced tenants and brokers underestimate how much local code compliance affects both cost and timelines. Ask the right questions (see the checklist below) and include a “buffer” for unknowns tied to inspections or fire requirements in older or high-rise buildings.

Tenant Improvement Allowance: What’s Typical and How to Get the Most From It

Tenant Improvement Allowance by Property Type (2024 Averages)
Property Type Typical Allowance ($/Sq. Ft.) Allowance Range
Office $30-$75 $20–$100
Industrial $10-$20 $5–$30
Retail $25-$60 $15–$80

Example: On a 5,000 square foot office, a $40/sq. ft. allowance means $200,000 toward improvements. Actual numbers depend on market factors, lease term, and how competitive your local commercial real estate market is right now.

Negotiating Your Office Tenant Improvement Allowance

  • Market factors that drive allowance amounts
  • How tenant improvement allowances affect rent structure
  • What ‘turnkey’ vs. ‘allowance’ means for tenants

Confident tenant and landlord negotiating tenant improvement allowance over legal documents in a conference room

Your tenant improvement allowance isn’t just a number—it’s a negotiation point that often depends on market strength, length of your lease agreement, and the landlord’s appetite to invest in building out your commercial space. In tight markets or trophy buildings, landlords may offer larger TIAs to attract stable tenants, but they’ll often recoup costs by raising base rent or shifting more of the budget responsibility your way.

Be clear about the difference between a “turnkey” build (landlord delivers the finished improvement project as part of the lease) and an “allowance” (landlord gives you a budget to manage improvements yourself). Know exactly what your TIA covers—and cap your exposure to extras, upgrades, or out-of-scope work.

Using Tenant Improvement Allowances Efficiently

  • Staying under budget
  • Aligning improvement allowances with must-haves and nice-to-haves

To maximize your TIA, work with your project manager and broker to draw a clear line between essential infrastructure (must-haves) and cosmetic upgrades (nice-to-haves). Track every dollar against your allowance, and set buffers for unexpected costs in power, data, or code compliance—those are where budgets usually break. Request allowances in writing and audit how costs are tracked during design and construction.

Office Tenant Improvement Case Study: Real-World Savings and Pitfalls

Case Study Overview: Cost-Saving Moves in Tenant Improvement Projects

CFO and project manager analyzing tenant improvement cost-saving charts in office

A mid-size tech firm in Los Angeles recently saved over $60,000 on its office tenant improvement project by prioritizing critical infrastructure and negotiating extra buildout credits upfront. Instead of high-end finishes, the team chose modular partitions, poured resources into power upgrades, and negotiated lighting supplier discounts. The company’s broker secured a $50/sq. ft. allowance, which, combined with cost-efficient project management, kept the entire project on track and under budget.

These real-world decisions highlight the importance of a strategic approach—ask for more TIA when the market allows, document every change order, and keep a hard line between essentials and upgrades. Their success shows what’s possible with a proactive approach to commercial real estate buildouts.

Lessons Learned: Avoiding Hidden Costs in Commercial Property Improvement

  • Pre-negotiating improvement allowances
  • Documenting power/data locations before final signoff
  • Leveraging landlord relationships to shorten approval cycles

Their biggest lesson: Don’t let the excitement of a move distract from the details. Clear, early documentation of every power and data drop, regular consultation with the landlord, and aggressive negotiation of both allowances and approval timelines made all the difference. These steps prevented rework, facilitated smooth inspections, and ensured every improvement supported long-term operational goals.

Practical Metro Realities: Office Tenant Improvement in DTLA and Major Cities

Navigating Building Access, After-Hours Work, and Local Inspections

Metro areas like DTLA present unique challenges: loading dock schedules, elevator permissions, after-hours construction labor premiums, and local code quirks. In dense commercial real estate environments, booking access time and getting city inspectors on-site can mean the difference between an on-time occupancy and expensive delays.

Coordinate early with building management to reserve elevator times, clarify after-hours rules, and understand city inspection processes. Factor these metro realities into your project schedule—and add a buffer for unavoidable urban delays.

DTLA-Specific Red Flags in Tenant Improvements

  • Parking, elevator booking, and freight restrictions
  • Overtime labor costs for after-hours construction
  • Approval delays unique to historic or high-rise commercial real estate

Property manager observing after-hours tenant improvement in busy DTLA office lobby

Expect increased scrutiny on fire exits, ADA compliance, and historical features in downtown LA properties. Overtime labor premiums are significant for after-hours or weekend build-outs. Verify all logistics and restrictions in writing before the construction phase begins to avoid costly last-minute roadblocks.

Questions to Ask During Office T.I. Projects

  1. What exactly does my improvement allowance cover?
  2. How long should tenant improvement projects realistically take?
  3. What’s required for power/data upgrades in this building?
  4. Are there after-hours, access, or inspection rules?
  5. What are my options for value engineering tenant improvements?

Use this checklist to open dialogue with your broker, general contractor, or landlord well before your project starts. The best improvement projects start with clear, shared expectations from everyone at the table.

Detailed Insights Into Office T.I.

What is an example of a tenant improvement?

A classic example of a tenant improvement is converting an open commercial office floor into a series of glass-walled meeting rooms, adding private offices along the perimeter, and rerouting power/data to accommodate collaborative workstations. Other improvements include new lighting, custom flooring, HVAC upgrades, and accessible restrooms made to a leased office space.

What is a typical tenant improvement allowance?

A typical tenant improvement allowance ranges between $30 and $75 per square foot for office space, but it varies based on property type, lease terms, and location. The allowance is meant to cover most costs related to build-out, finishes, and infrastructure needed to customize the commercial space for your specific business.

What is a $40 tenant improvement allowance?

A $40 tenant improvement allowance means the landlord offers $40 per square foot of leased space—so on a 3,000 square foot office, the total allowance is $120,000. Tenants can use this budget for construction, fixtures, and finishes approved in the lease agreement, but must cover any cost overruns themselves.

Hands calculating tenant improvement costs with calculator and architectural plans in office

What is a commercial tenant improvement?

A commercial tenant improvement describes modifications made to leased business premises—such as offices, retail, or industrial property—to suit the operating and brand needs of the tenant. This includes interior construction, systems upgrades, and finish work that goes beyond the building’s shell to create a customized and functional workflow for the company leasing the space.

FAQs: Office Tenant Improvement and Allowances

  • Are tenant improvement allowances taxable?
    Generally, tenant improvement allowances are not taxable income if used directly towards qualified build-out expenses. However, always consult a qualified tax advisor as tax laws change and can differ by jurisdiction.
  • What’s the difference between a tenant improvement project and capital improvements?
    Tenant improvement projects benefit the current tenant and usually revert to the landlord at lease end. Capital improvements, by contrast, are upgrades that permanently enhance the building’s value, such as a new HVAC system, and are typically landlord investments.
  • Can I use improvement allowances for furniture and fixtures?
    Most improvement allowances cover construction, wiring, and fixed equipment but may or may not include furniture. Always clarify which items are included in writing during the allowance negotiation.
  • How do GCs and project managers estimate tenant improvement project costs?
    Experienced GCs use historical data, material/labor market rates, and detailed project scopes to build precise cost estimates. Early, line-item breakdowns help catch overruns and avoid surprises as the project progresses.

Key Takeaways for TI Projects

  • Plan early for power, data, and layout to avoid unexpected costs
  • Negotiate your tenant improvement allowance vigorously
  • Understand city-specific hurdles in DTLA or metro areas
  • Always verify what’s covered before starting work

Smart office tenant improvements begin with clear definitions, proactive planning, and hard-won lessons—put these insights into practice and you’ll achieve a build-out that enhances your business, stays on budget, and avoids costly surprises.

The Commercial Tenant Improvement Process, Step by Step: From Lease to Grand Opening

Did you know? Over 70% of new commercial tenants underestimate the time and complexity of the tenant improvement process, leading to costly delays and frustrated grand openings

Understanding the Commercial Tenant Improvement Process: Why It Matters

  • Quick definition: The commercial tenant improvement process is the sequence of planning, negotiating, designing, permitting, building, and completing renovations or upgrades to a rented commercial space to suit a tenant’s specific needs.
  • Why is it crucial? Both tenants and property owners are deeply invested in the outcome. For tenants, the process can make or break business operations and branding. For owners, well-executed tenant improvements can increase long-term property value and tenant satisfaction.
  • Shaping your business launch: Your approach to tenant improvements sets the stage for everything: staff productivity, customer experience, and your ability to open on schedule. Missteps can mean missed revenue, over-budget projects, and strained landlord-tenant relationships.

“Over 70% of new commercial tenants underestimate the time and complexity of the tenant improvement process, leading to costly delays and frustrated grand openings.”

Vibrant urban office renovation with business professionals reviewing blueprints in a partially finished modern office space, highlighting the commercial tenant improvement process

What You’ll Learn About the Commercial Tenant Improvement Process

  • Essential steps in the tenant improvement process—what happens, when, and why
  • Key decisions, costs, and timelines for successful commercial tenant improvements
  • Red flags and practical metro realities every tenant should watch for

What Is a Commercial Tenant Improvement?

A commercial tenant improvement is any renovation, alteration, or customization of a leased commercial space. The tenant improvement process covers changes such as adding walls, upgrading lighting, installing new HVAC, or reconfiguring floor layouts. Tenant improvements allow businesses to optimize leased space to meet operational needs and reflect their brand.

Tenant improvements are a cornerstone of most commercial real estate transactions—affecting lease terms, rents, and business timelines. The scope can range from simple paint and carpet upgrades to complex structural overhauls, each with unique implications for budgeting, scheduling, and compliance with building codes.

Commercial Tenant Improvement vs. Tenant Improvement Projects

  • Definition & scope: “Tenant improvements” (often abbreviated TI) typically refer to landlord-funded changes negotiated in the lease, while a “tenant improvement project” may involve both landlord and tenant investments, sometimes exceeding the standard allowance.
  • Common examples: Adding glass-walled conference rooms, new restrooms, upgraded wiring for tech businesses, or restaurant kitchens.
  • Who pays and who benefits? Costs are typically shared—landlords offer a tenant improvement allowance, while tenants pay for additional upgrades. Both parties stand to gain from a successful tenant improvement project: tenants get an efficient space; landlords boost property value and attract stable renters.

“Tenant improvements are not just about aesthetics—they’re strategic investments in usability, efficiency, and tenant satisfaction.” — Industry Expert

The Six Essential Steps in the Commercial Tenant Improvement Process

Step Main Task Typical Timeline Average Cost Range*
1. Lease Agreement & TI Allowance Negotiate terms; secure funding for improvements 2–4 weeks $0–$100/sq.ft. (allowance varies)
2. Space Planning & Design Hire design team; finalize plans 2–6 weeks $2–$8/sq.ft. (design fees)
3. Permitting & Compliance Apply for permits; ensure code compliance 2–12 weeks $2–$10/sq.ft. (fees & upgrades)
4. Contractor Selection Bid process; select general contractor 2–4 weeks Generally included in construction cost
5. Construction Complete build-out 6–24 weeks $50–$250+/sq.ft. (dependent on scope)
6. Final Closeout Inspections; punch list; move-in 2–4 weeks $0–$10/sq.ft. (final costs, varies)

*All cost/time estimates are typical ranges and will vary widely by location, size, scope, and market conditions.

Step 1: Lease Agreement and Tenant Improvement Allowance

  • Negotiating the tenant improvement allowance: Landlords may offer a fixed sum (“TI allowance”), such as $30–$60 per square foot, to help cover renovation costs. It’s crucial to align this with your build-out needs before signing the lease agreement.
  • The allowance’s role: The improvement allowance is central to your commercial tenant improvement process—covering critical upgrades like flooring, lighting, and compliance fixes, but it may not cover everything on your wish list, especially if your vision is ambitious or highly customized.
  • What to watch for: Lease terms may limit TI spending to certain suppliers, restrict cosmetic vs. infrastructure improvements, or introduce “ratchet clauses” that prevent renegotiation if bids come in high.

Commercial real estate agent and tenant negotiate tenant improvement allowance and lease agreement with handshake over contract paperwork

Step 2: Space Planning & Design Approval

  • Assembling the team: Engage architects, designers, and sometimes consultants early. Skilled professionals are key for aligning tenant improvement projects with operational, branding, and compliance needs.
  • From goals to blueprints: Your space planning phase translates your business vision into detailed drawings. These must meet both local building codes and requirements set out in your lease agreement—every wall, outlet, and finish counts.

Careful planning in this phase is critical, as decisions now affect everything from the cost to how smoothly the improvement project runs. Many successful tenant improvement projects start here with clear documentation, branding input, and code awareness from the jump.

Step 3: Permitting, Building Codes, and Compliance

  • Understanding building codes: Every commercial tenant improvement must comply with local and state building codes, which set standards for safety, accessibility, and environmental compliance. Don’t underestimate how much these requirements can shape a project’s timeline and budget.
  • ADA, fire, and energy codes: Accessibility (ADA), fire safety, and energy efficiency rules are strictly enforced. Failure to comply can trigger rejection of your plans—or costly last-minute fixes during inspections.
  • Permitting efficiency: Plan early for the building permit process. Submission requirements vary by city, but a well-prepared application with contractor, architect, and landlord input speeds approval, which is especially important in busy commercial hubs.

Costs and timeline delays at this stage are common. Using professionals familiar with your city’s permitting system and current codes and regulations can help avoid compliance issues that derail many improvement projects.

Step 4: Bidding and General Contractor Selection

  • RFPs & vetting: Issue Requests for Proposal (RFPs) to pre-qualified contractors. Compare not just price, but experience with improvement projects of similar size, familiarity with the building, and reputation for quality and schedule adherence.
  • Key questions: Ask potential general contractors about their subs, insurance, change order processes, prior work with commercial tenant improvements, and how they handle surprises. Insist on clear bids—avoiding “too good to be true” lowball offers that can balloon with extras mid-project.

Your general contractor will be your main partner throughout the construction phase, so make this a thorough, reference-backed decision.

Step 5: Construction Phase and Project Management

  • Logistics & site access: Especially in metro areas, getting materials to the site, scheduling skilled crews, and working within building rules (e.g., after-hours construction) can add complexity and delay to the tenant improvement process.
  • Common issues: Surprises frequently arise—unseen behind-wall conditions, slow supply chains, or inspection reschedules. An experienced project manager manages these disruptions, keeping communication flowing and timelines on track.
  • Managing disruptions: Minimizing noise, dust, and business interruption is key, especially if your neighbors or the property as a whole is occupied. Plan for after-hours or phased work, and maintain a tight punch list of open items and inspections.

Step 6: Final Inspections, Punch Lists, and Grand Opening

  • Punch lists explained: A punch list documents small fixes and tweaks needed after the main construction. It’s how you make sure your space is “move-in ready” and all contract terms have been met.
  • CO and approvals: You’ll need a Certificate of Occupancy (CO) and final approvals from local authorities before moving in. This step ensures your improved space is safe, legal, and ready for business operations.

Small business owners celebrate the grand opening after successfully completing the commercial tenant improvement process

Practical Metro Realities: What You Should Know

  • Downtown challenges: In busy hubs like downtown Los Angeles, access for contractors, parking for suppliers, and even elevator reservations can slow projects dramatically. Lead times for materials and inspections typically run longer.
  • Permitting bottlenecks & logistics: City offices are often backlogged. Simple permit approvals can stretch from weeks to months. Scheduling with city inspectors, especially during construction phase, means you must build flexible timelines—and a financial cushion—into your tenant improvement project plan.

General contractor and manager review plans on a busy downtown LA street, addressing metro tenant improvement process challenges

Red Flags, Common Pitfalls, and How to Avoid Them in the Commercial Tenant Improvement Process

  • Budget overruns: Tenant improvement allowances are helpful, but rarely cover full build-out costs. “Value engineering” late in the process is a red flag—the time for budgeting is up front with realistic estimates for scope and finishes.
  • Hidden costs & delays: Unanticipated compliance issues, extended timelines for permitting, or miscommunications between contractor, landlord, and tenant can add thousands in delay costs and lost rent.
  • Communication breakdowns: Insist on weekly updates, shared project trackers, and signed-off change orders. Clarity and paper trails protect you from finger-pointing down the road.
  • Strategy tip: The best safeguard is setting clear expectations—on budget, schedule, design, and code compliance—from the earliest stages with everyone on your tenant improvement team.

“The best-managed improvement projects start with clear communication and end with fewer surprises.” — Commercial Project Manager

Preparing for Each Stage of Your Commercial Tenant Improvement Project

  • Pre-negotiation: Know your must-haves, nice-to-haves, and red lines before entering lease talks. Gather sample improvement project bids to inform your TI allowance negotiation.
  • Key Documents: Collect and organize all plans, permits, and critical approvals in one place. Digital project management tools can help—ask your GC or broker for templates they recommend.
  • Ready to build? Confirm your design and budget are fully approved, your contractor is selected, insurance is in place, and city permit stamps are official before breaking ground.
  • Final walk-through: Use a detailed punch list with sign-offs from landlord, GC, and tenant. Document any last snags and establish who will address them (and by when) to avoid move-in day disputes.

Project manager and architect reviewing blueprints and permits to prepare for the commercial tenant improvement process


People Also Ask About the Commercial Tenant Improvement Process

What is a commercial tenant improvement?

  • A commercial tenant improvement is any renovation or alteration made to a leased space to fit the tenant’s specific operational needs.

What is a $40 tenant improvement allowance?

  • A $40 tenant improvement allowance refers to the landlord’s contribution, typically $40 per square foot, toward the cost of the tenant’s build-out projects.

What is an example of a tenant improvement?

  • Examples include installing new walls, lighting, restrooms, HVAC systems, or changing floor layouts in an office or retail space.

What is a ratchet clause in a commercial lease?

  • A ratchet clause restricts renegotiation of terms, usually only allowing rent increases, not decreases, affecting the economics of tenant improvement negotiations.

FAQs: Commercial Tenant Improvement Process

  • How long does the commercial tenant improvement process take?
    Most improvement projects take 3 to 12+ months, depending on the complexity, permitting delays, and contractor schedules. Start early to allow for surprises and city slowdowns.
  • Who manages the tenant improvement project—the landlord or tenant?
    It depends on the lease agreement. Often, tenants hire their own project manager or GC, but landlords may manage core building work. Clarify these roles at the start.
  • What if my project exceeds the improvement allowance?
    Tenants are responsible for any costs above the negotiated TI allowance. Track bids closely and budget for overruns.
  • How can I avoid delays with permit approvals or building codes?
    Hire designers, contractors, and consultants with local experience, and build in buffer time for permit reviews and resubmittals.
  • Are tenant improvements tax-deductible?
    Often partly, but tax treatment is complex and changes. Consult a commercial real estate tax advisor for the current rules in your jurisdiction.

Construction manager points at commercial tenant improvement process project timeline with color-coded notes

Key Takeaways: Succeeding in the Commercial Tenant Improvement Process

  • Start early: Negotiating your lease and planning the improvement project drive the whole timeline.
  • Read your lease: Know the details on TI allowances, ratchet clauses, and restrictions before committing.
  • Communicate: Keep direct lines open with your contractor, broker, landlord, and project manager to reduce surprises.
  • Expect the unexpected: Delays, especially in major metros, are the rule—not the exception.
  • Use checklists: Checklists are your friend for tracking every detail and avoiding missed steps.

Ready to succeed with your commercial tenant improvement process? Send this guide to your broker, GC, or project manager for a smoother, more predictable build-out!

The commercial tenant improvement process may be complex, but clear planning and proactive management transform it into a launchpad for your successful business.

How to Choose a Commercial Contractor for a TI: The Questions That Reveal the Best Fit

Are all commercial contractors truly the same, or could your choice make the difference between a smooth grand opening and a costly construction nightmare?

When you’re selecting a commercial contractor for a tenant improvement (TI) project, the stakes could not be higher—especially if you’re a tenant, broker, small business owner, or property manager walking this path for the first time. This field-guide arms you with plain-English insights for decoding the process, exposing common pitfalls, and uncovering the questions that reveal the very best fit for your business space—whether you’re opening a retail store in Downtown LA or building out a new healthcare facility in a suburban business park.

Unlocking Success: Why Selecting a Commercial Contractor Matters in Tenant Improvements

Tenant improvements (TIs) involve substantial investments of time, money, and trust, so choosing the right commercial contractor is a critical decision that can make or break your project. Not all contractors are created equal; some excel at handling the complexities of commercial construction in busy urban environments, while others may lack the expertise or resources to tackle your unique needs.

A seasoned commercial construction contractor not only understands the technical demands of a build-out, but also the nuances of local permitting, efficient project management, and maintaining a stellar safety record. This ensures your project stays on track, meets compliance, and guards against unexpected delays or costs. For tenants and small business owners, comparison shopping for a general contractor is just as important—if not more so—than selecting an architect or designer. The right choice delivers quality work, safety, and peace of mind; the wrong one can stall your business for months, erode budgets, and sabotage future success.

Professional business team discussing commercial construction plans, collaborating over blueprints and tablets for selecting a commercial contractor

What You’ll Learn in This Guide to Selecting a Commercial Contractor

  • Definition of TI and the role of a commercial contractor

  • Key differences between general contractor, construction contractor, and commercial construction contractor

  • Essential questions for vetting commercial contractors

  • How to evaluate project management, safety record, and previous commercial projects

  • Red flags and costly mistakes to avoid in your commercial construction project

  • How to factor in local regulations and logistical challenges

Defining Tenant Improvement: What Is a Commercial Construction Contractor’s Role?

Tenant improvement (TI) refers to customizing or upgrading a leased commercial space—such as an office building, retail space, or healthcare facility—to meet the specific needs of the incoming tenant. This might include anything from minor cosmetic changes to complete reconfigurations, new walls, flooring, lighting, and mechanical upgrades. In every TI project, a commercial contractor acts as the orchestrator, overseeing everything from permit approvals and materials procurement to schedule management and on-site safety.

The general contractor coordinates all vendors, subcontractors, and day-to-day operations to ensure efficient and safe execution. In commercial projects, their role expands into managing complex logistics, strict commercial codes, and tight deadlines. An experienced commercial construction contractor is familiar with high-traffic or challenging environments like Downtown LA, where timing, safety, and precise execution are paramount. The difference between a smooth project and a stalled one often comes down to the knowledge, experience, and proactive approach of your selected contractor.

Construction project manager and team reviewing tenant improvement blueprints in active commercial building, role of commercial contractor

Quick Definitions: General Contractor vs. Commercial Contractor vs. Construction Contractor

  • General Contractor Responsibilities: Oversees all aspects of the construction project, hires and manages subcontractors, and coordinates project schedules.

  • Commercial Contractor Specialization: Specializes in projects for business environments—offices, retail, healthcare—requiring advanced code knowledge and complex logistics.

  • When to Use a Commercial Construction Contractor: For any commercial space where compliance, safety, and business continuity are critical, or when the project scope goes beyond basic renovations.

The High Stakes of Selecting a Commercial Contractor for Your Commercial Construction Project

“The wrong contractor in DTLA can stall your business for months — the right one keeps you on track and on budget.”

The cost of a misstep when selecting a commercial contractor extends far beyond your construction budget. Mismanaged commercial projects can result in drawn-out timelines, failed inspections, or even having to pause operations. Many business owners learn the hard way that commercial contractors are not all created equal; deep experience in projects similar to yours, and a history of quality work are non-negotiable. Also, your contractor must have a proven safety record—particularly on large construction projects in occupied buildings, where a single oversight can have legal and financial ramifications.

Reliable contractors thrive on attention to detail, clear project management, and exceptional communication. On the flip side, hiring an inexperienced contractor can quickly spiral into costly mistakes. The right contractor helps you navigate tight lead times, after-hours restrictions, permits, and city requirements to ensure your project launches on time—with no surprises.

Step-by-Step: How to Evaluate and Select a Commercial Contractor

Step 1: Outline Your Construction Project Scope and Priorities

The foundation of a successful project begins with a clear and honest evaluation of what you need—both now and into the future. Identify and document your must-haves (square footage, layout changes, accessibility needs) and nice-to-haves (designer finishes, smart technology, etc.). Setting tight parameters at this stage allows your construction contractor to provide accurate bids and helps avoid expensive change orders later.

Map out your anticipated project timeline, desired outcome, and any on-site logistical challenges (for example, after-hours access in a high-rise, or delivery constraints). This information gives potential commercial contractors a realistic sense of your expectations and helps weed out contractors unable to meet your requirements. Well-defined goals make it easier to keep projects on track from the outset.

Detail-oriented professional drafting a commercial construction project plan, demonstrating scope and priorities for selecting a commercial contractor

Step 2: Shortlist General Contractors with Commercial Construction Experience

Once you have defined your project scope, build a shortlist of general contractors who have completed commercial construction projects like yours. Look for contractors with not just technical skill, but also a portfolio showing relevant commercial projects—such as transforming offices, retail spaces, or medical suites in comparable locations. Vetting experience in your metro area is especially important, since each city presents unique codes, logistical hurdles, and vendor relationships.

Ask about subcontractors, in-house trade skills, and whether they routinely work with tenant improvement timelines. Avoid generalists without proven commercial track records; an experienced construction contractor should readily provide case studies or references for projects similar to yours. Choosing seasoned commercial construction contractors reduces risk and increases the odds of a smooth project lifecycle.

Step 3: Assess Past Commercial Projects and References

Don’t just take a contractor’s word for it—request detailed references and visit completed commercial projects if possible. That’s the surest way to see the contractor’s quality work and standards in action. Ask specific questions about each reference’s project scope, how challenges were handled, and if the schedule and budget met expectations. Inquire about how well the contractor communicated changes, updates, and milestones.

Look for transparency in client feedback and clarity about what went well versus what could have been improved. An open, honest conversation with recent customers is the best litmus test for any general contractor or commercial construction contractor. Positive references not only prove capability, but also reveal the contractor’s attitude toward problem-solving and accountability.

Satisfied client and contractor shaking hands in a completed modern commercial space, positive outcome of selecting a commercial contractor

Step 4: Dig Into Project Management Tools, Communication, and Safety Record

Ask how your construction manager plans to communicate—weekly site meetings, digital dashboards, or cloud-based documentation? Responsive communication is essential for catching issues early and keeping all stakeholders—tenants, brokers, property managers—in sync

Equally vital is a contractor’s safety record. Request evidence of safety training, insurance documentation, and recent safety metrics for commercial construction projects they’ve managed. A transparent safety record demonstrates not just regulatory compliance, but a commitment to protecting workers, visitors, and your property. Good contractors integrate safety and project management, reducing liability and minimizing costly disruptions.

What to Ask When Selecting a Commercial Contractor for Your TI Build-Out

  1. What experience do you have in similar tenant improvements and commercial projects?

  2. How do you handle permitting and city inspections in DTLA or my metro area?

  3. What is your approach to project management and communication?

  4. Can you provide a recent safety record and describe your safety processes?

  5. How do you manage after-hours work and access constraints?

  6. What is the average lead time for your construction projects?

  7. How do you handle change orders and unforeseen commercial construction challenges?

“Good general contractors educate you up front instead of surprising you down the road.

Ask them to walk through their process, step by step.”

Red Flags and Warning Signs

  • Unclear or vague bids and project scopes

  • Lack of experience with commercial construction in your area

  • Poor safety record or missing insurance documentation

  • Inflexible scheduling or inability to handle after-hours work

  • Limited references for completed commercial construction projects

Local Considerations: Navigating Metro Challenges with Your Commercial Contractor

Commercial construction crew coordinating material delivery in a busy Downtown LA street, local realities for selecting a commercial contractor

Permits, Inspections, and Access in Downtown LA

  • Logistics of delivering materials and equipment: Downtown areas often have tight delivery windows. Ask your contractor about advance scheduling, street closures, and elevator times for moving large loads.

  • Navigating city approvals for commercial construction projects: Timely permitting and smooth inspections are key predictors of a successful project. A local contractor knows city hall inside out and can preempt common snags.

  • Managing after-hours constraints and building access: Many commercial high-rises and retail spaces require work to be completed outside business hours. Choose a contractor who can coordinate crews, deliveries, and inspections beyond the standard 9-to-5.

Essential Questions to Ask Your Commercial Contractor: Printable Checklist

Question Why It Matters
What relevant commercial projects have you completed? Shows experience with similar scopes and challenges
What is your safety record on construction projects? Protects your timeline, liability, and staff
How do you communicate project status and changes? Ensures transparency and fewer surprises
How do you handle unforeseen issues or changes? Reveals flexibility and responsiveness


Frequently Asked Questions

  • What’s the typical timeline for a commercial TI project?
    Most tenant improvement projects range from a few weeks for smaller retail spaces to several months for large-scale office buildings or healthcare facilities. The exact duration depends on permitting, site conditions, and project management efficiency.

  • How does a general contractor differ from a construction contractor?
    A general contractor manages every aspect of the project, including subcontractors, schedules, and procurement, while a construction contractor may focus on specific trades or portions of the build. For TI projects, you want a general contractor with proven commercial experience.

  • Is it better to use a local commercial construction contractor?
    Yes. Local contractors bring vital knowledge of regulations, traffic, third-party vendors, and permitting processes specific to your city, all of which can avoid costly surprises and delays.

  • What documents should I receive before the project starts?
    You should receive a detailed contract, proof of insurance and licensing, a project schedule, and clear specifications for your TI scope. Don’t proceed without written confirmation of these items.

  • What insurance and licensing should a commercial contractor provide?
    Ensure your contractor holds all required state and city licenses, workers’ comp, general liability insurance, and, if needed, umbrella coverage for your type of construction project.

Key Takeaways

Confident business owner reviewing a completed checklist with a commercial contractor in a finished tenant improvement office

  • Always ask for proof of experience and a solid safety record.

  • Get clarity on scheduling, access, and communication methods.

  • Use a detailed checklist during your interviews and evaluations.

  • Borrow lessons from past commercial construction projects to avoid repeating mistakes.

Set yourself up for TI success: Email this list to your broker, project manager, or keep it handy for your next commercial project kickoff.

Shell Space vs Second-Generation Space: Which TI Path Is Faster (and Which Is Riskier)?

Shockingly, office tenants in DTLA who opt for shell space can face up to 12 weeks of added lead time compared to those leasing second-generation offices—impacting both the speed of move-in and cost curves dramatically.

If you’re navigating a commercial real estate search, knowing the difference between shell space vs second generation space is critical. Your choice will shape construction costs, lease negotiations, and even the ability to open your doors on schedule. This field-guide cuts through jargon, highlights the real-world risks and rewards of both TI paths, and arms you with the key questions to ask before you sign anything.

Startling Trends: The Real Cost of Choosing Shell Space vs Second-Generation Space

Across downtown Los Angeles (DTLA) and other major metros, the debate between shell space vs second generation space is more than just a matter of personal taste or brand aesthetics. The hidden costs—delayed occupancy, runaway construction costs, and stretched improvement allowances—can torpedo even the most prepared tenant’s move-in schedule. For small business owners, first-time commercial lessors, and brokers, getting blindsided by the nuances of shell condition can derail a deal at the last moment.

Office space selection today involves unique pressures: tight construction labor markets, unpredictable permitting delays, and supply chain snags for mechanical systems. Recent market data and brokers report that shell space, with its raw, completely unfinished interiors, commonly adds months to the tenant improvement timeline. Meanwhile, second-generation office space—spaces previously occupied with existing walls and services—are increasingly attractive for their move-in ready status and reduced risk. But that doesn’t mean it’s an automatic win; hidden utility issues and code upgrades can trip up even experienced teams.

Modern office building lobby with shell space and second generation space features, photorealistic, sunlit, in downtown cityscape

What You’ll Learn: A Quick Guide to Shell Space vs Second-Generation Space

  • Definitions and differences of shell space vs second-generation space
  • Cost, speed, and tenant improvement (TI) implications
  • Practical risks and red flags
  • Metro-specific realities for office space in key cities
  • Must-ask questions for brokers, GCs, and property managers

Shell Space vs Second-Generation Space: Fast Definitions

What is Shell Space and Why Does It Matter in Office Space TI?

Shell space in commercial real estate refers to an office or retail suite delivered as a blank slate: exposed concrete floors, open ceilings, no interior walls, unfinished restrooms, and mechanical systems (HVAC, electrical, plumbing) often “stubbed in” but not operating. This level of incompleteness—sometimes called a grey shell—offers full customization for new tenants to design a floor plan exactly to their needs. However, it also means all the heavy lifting (and heavy spending) falls on the tenant and their contractor. TI costs skyrocket, and the tenant improvement timeline can stretch to account for permitting, design, and full construction. If move-in speed, budget certainty, or code compliance is a top concern, shell space’s flexibility can quickly morph into a pitfall.

What is Second-Generation Space?

A second-generation space—sometimes called “2nd gen office space”—is a commercial suite previously occupied and already built out. This space usually includes interior walls, finished ceilings, lighting, installed restrooms, and operational HVAC and electrical. The interior space may be move-in ready or require only minor cosmetic updates and layout tweaks. Compared to shell space, second-generation offices typically offer much faster occupancy, lower tenant improvement costs, and less unpredictable risk (thanks to infrastructure left behind by the previous tenant). However, this ready-made setup sometimes requires compromise—accepting an existing floor plan or reworking outdated finishes.

Unfinished commercial shell space in downtown office building, exposed concrete floors, neutral palette, photorealistic

Grey Shell, Warm Vanilla Shell, Vanilla Shell, and Spec Suite: Key Differences

Not all “shells” are created equal in commercial real estate. Here’s a plain-English breakdown:

  • Grey Shell: Raw, unfinished space with basic utilities only roughed in. No ceiling grid, no walls, often an open concrete floor. Occupancy speed is slow, and costs are highest.
  • Warm Vanilla Shell: HVAC system, finished ceiling, lights, and sometimes restrooms are in place. This shell condition can notably reduce build-out time but still allows significant customization.
  • Vanilla Shell: An upgrade over grey shell—offers painted or primed walls, basic flooring, operational mechanical systems, and plumbed restrooms. Move-in may still require some interior improvements, but the biggest headaches are handled.
  • Spec Suite: Speculative, pre-built suites designed for rapid tenant occupancy. Finished ceiling, built-out offices, conference rooms, and oftentimes even furniture in place. Lower TI costs and nearly immediate move-in, but with less design flexibility.
Comparison Table: Shell Space vs Second-Generation Space
Feature Shell Space Second-Generation Space
Speed to Occupancy Slow (12–24 weeks) Fast (2–8 weeks)
Build-Out Costs High (new construction required) Lower (cosmetic & minor changes)
Risk & Complexity Higher (permitting/unknowns) Lower (existing utilities, layout in place)
Flexibility Highest (design to suit) Moderate (adapt existing)
Typical Users Medical, HQ, highly-specialized uses Tech, law, creative, cost-conscious tenants
Tenant Improvement Allowance Often higher Usually moderate
Permit Risk High Moderate–low

Why Shell Space vs Second-Generation Space Choice Drives Your TI Timeline and Budget

Impact of Shell Condition on Tenant Improvements (TI)

Shell condition is everything when calculating your tenant improvement (TI) scope, cost, and timeline. A grey shell requires you (and your general contractor/GC) to handle every installation—from the ceiling grid to finished floors to mechanical, electrical, and plumbing (MEP) systems. If the floors are bare concrete and the HVAC system is non-operational, your construction costs will jump, and the schedule will stretch as you work through permitting, city inspections, and potential lead time for utility connections.

Second-generation space reduces risk by building on existing infrastructure. With layout, restrooms, lighting, and climate control often functioning, a new tenant can focus on reconfiguring the interior walls, updating finishes, or making minor layout tweaks. Speed is typically 2–3 times quicker than raw shell, with many clients reaching occupancy in under eight weeks. For tenants with limited improvement allowance or who need to minimize downtime and costs, second-generation is usually the lower-risk path.

Collaborative team reviewing office space floor plans for tenant improvement in second generation office space

Risks of Grey Shell and Vanilla Shell vs Spec Suite Build-Outs

Committing to a grey shell or even a vanilla shell space means owning all the unknowns—unanticipated construction costs, permit delays, and sometimes code compliance surprises. Utility stubs may be present, but finishing them to meet local requirements takes time, and missing one small detail (like ADA restroom specs) can hold up your entire move-in date. Construction labor shortages and metro-specific red tape (think Los Angeles or San Francisco) only amplify the risk.

By contrast, spec suites are built for speed. The landlord has already handled the high-risk items: installation of finished ceilings, proper lighting, restrooms, and code-compliant mechanical systems. While the creative freedom is lost, so are most of the headaches and timeline disasters. Still, tenants must check that the suite aligns with their space needs, and confirm all accessibility and code requirements are up to date. In rare cases, even spec suites may require additional upgrades due to rapidly evolving local codes.

Office Space Lead Times and Permit Hurdles in Popular Metro Markets

Some of the most overlooked challenges in choosing shell space vs second generation space come from local city approval processes, especially in large employment centers like DTLA, New York, and San Francisco. It’s not uncommon for grey shell office space to be delayed by permitting schedules, inspection bottlenecks, or backlog in utilities activation. One missed inspection window can cascade into a month-long delay, especially with complex tenant improvement scopes.

“Second-generation spaces can offer 30% shorter build-out times if utilities and restrooms are functioning — but missing one inspection window in LA can delay you by a month.”

Metro rules impact everything from after-hours access to construction lead times and noise or elevator use restrictions. Before signing a lease, tenants and brokers should demand clarity on the history of city inspections, adherence to accessibility standards, and the true status of HVAC, electrical, and plumbing. Knowledge of these metro realities can mean the difference between a fast, stress-free move or sitting idle for weeks as city agencies catch up.

Step-by-Step: Evaluating Shell Space vs Second-Generation Space for Your Office Space

  1. Inspect the shell condition (grey shell vs vanilla shell vs spec suite).
  2. Confirm operational MEPs, restrooms, and core amenities.
  3. Assess existing real estate layouts and compliance with local codes.
  4. Calculate TI allowance versus likely construction costs.
  5. Check for access, after hours rules, and construction lead times in your metro.

Shell space vs second generation office walkthrough with inspector and business tenant reviewing concrete floors, exposed beams, unfinished interior

Office Space Checklist: Red Flags and Questions to Ask Your Broker/GC/LL

  • Is the HVAC system operational or just roughed in?
  • Does the spec suite meet current accessibility code requirements?
  • Are MEPs stubbed to the suite?
  • Is ceiling plenum height adequate for your intended use?
  • What are the typical build-out times and main inspection bottlenecks in this building?

Real-Life Pitfalls: Metro Examples from DTLA and Beyond

In-Depth: Delays and Cost Overruns in Shell Space Transformations

The bottom line? Raw shell offers creative design freedom, but the cost in lost downtime and unpredictable budget overruns is real, especially in complex metro areas

By comparison, a vanilla shell in a Class A tower offered another tenant a faster schedule, but the “ready” restrooms failed local ADA inspection. The $30,000 remediation wasn’t in the GC’s original estimate, stalling occupancy. Brokers, tenants, and property managers must always dig into the precise shell condition and inspection history—otherwise a fast-tracked deal can quickly reverse course.

2nd Generation Office Space: Unexpected Surprises and Success Stories

Second-generation office spaces are celebrated for their quick TI turnaround, but they’re not without surprises. One tech startup in San Francisco signed for a spec suite expecting a turnkey experience. Yet, the previous tenant had made unpermitted restroom modifications, leading to a failed city inspection and a month-long delay. In another example, a creative agency moved into a 2nd gen suite in record time, taking occupancy in just 16 days thanks to a diligent broker who validated every system and code requirement upfront.

The biggest lesson: second-generation space delivers speed and lower construction costs—if all building systems are operational and compliance is pre-checked. Bringing in third-party inspectors and involving the GC in pre-signing walkthroughs can help avoid common pitfalls, especially when adapting another company’s old floor plan to your brand.

Finished second generation office space with furnished workstations and natural greenery, city views, photorealistic

How to Decide | Shell Space vs 2nd Gen Space

  • Who should pick which path (startups, medical, law firms, retail)?
  • How to maximize your tenant improvement allowance
  • What to confirm about utility, access, and approval processes
  • Must-have language in your lease or workletter

Essential Shell Space vs 2nd Generation Space Questions

What is a second generation space?

A second generation space is an office, retail, or commercial property that has already been built out, previously occupied, and typically features existing improvements, such as interior walls, finished floors, ceilings, lighting, and finished MEP services. This usually results in faster move-ins and lower tenant improvement (TI) costs compared to shell space.

What does shell space mean in real estate?

Shell space in real estate refers to a vacant office or commercial unit delivered in unfinished condition. It may lack flooring, walls, finished ceilings, restrooms, or operational HVAC and electrical systems, offering maximum flexibility but requiring a more extensive (and expensive) TI build-out.

What does 2nd generation mean in real estate?

In real estate, ‘2nd generation’ describes any space that has undergone a prior build-out and use. It generally features all necessary improvements, from walls to restrooms and working HVAC, allowing a new tenant to move in quickly and modify only as needed.

What are the 4 types of leases in real estate?

The four main types of leases in commercial real estate are: Full Service Gross, Modified Gross, Triple Net (NNN), and Absolute Net leases. Each allocates building expenses, maintenance, and taxes differently between landlord and tenant — important to understand before securing shell or second-generation space.

Key Takeaways

  • Choosing between shell space vs second-generation space can add or subtract weeks (and thousands in TI)
  • Shell space offers creative freedom, but higher costs and more uncertainty
  • Second-generation and spec suite options save time — but verify if upgrades will be needed
  • Always check for existing permits, utilities, and local code quirks before signing

“Ask early about shell condition, inspection history, and local jurisdiction bottlenecks — downtown deals can hinge on what the city’s backlog looks like this month.”

FAQs: Shell Space vs Second-Generation Space

  • Is shell space rent always cheaper than second-generation?
    Shell space sometimes comes with lower base rent, but the upfront TI costs and timeline can outweigh those initial savings. Second-generation spaces may charge higher rent per square foot, but lower build-out costs often mean a better total value.
  • What are the lead times for TI in shell vs spec suite?
    Shell space build-outs typically take 12–24 weeks, depending on city and condition. Spec suites, however, can often accommodate tenants within 2–8 weeks due to their finished or nearly finished interiors.
  • How do shell condition and previous TI determine final cost?
    The fewer functional systems present, the higher your construction costs. Grey shell spaces are the most expensive to finish, while second-generation spaces require only aesthetic or minor layout changes, resulting in far less spend on improvements.
  • Does vanilla shell always mean restrooms are installed?
    Not always. Some vanilla shell definitions include fully plumbed and finished restrooms, while others only rough in plumbing. Always walk the space and ask specifically about restroom completeness before making assumptions.

Business team discussing shell space vs second generation office space lease, confident and optimistic, sunlit office conference room, photorealistic

Ready to Decide Between Shell Space vs Second-Generation Space?

Email this page to your broker, GC, or project manager, before you sign a new office space lease.

Deciding between shell space and second-generation office space shapes your project’s timeline, risk, and budget.

Start the process armed with the right questions, the true state of each space, and a checklist to keep surprises at bay.