
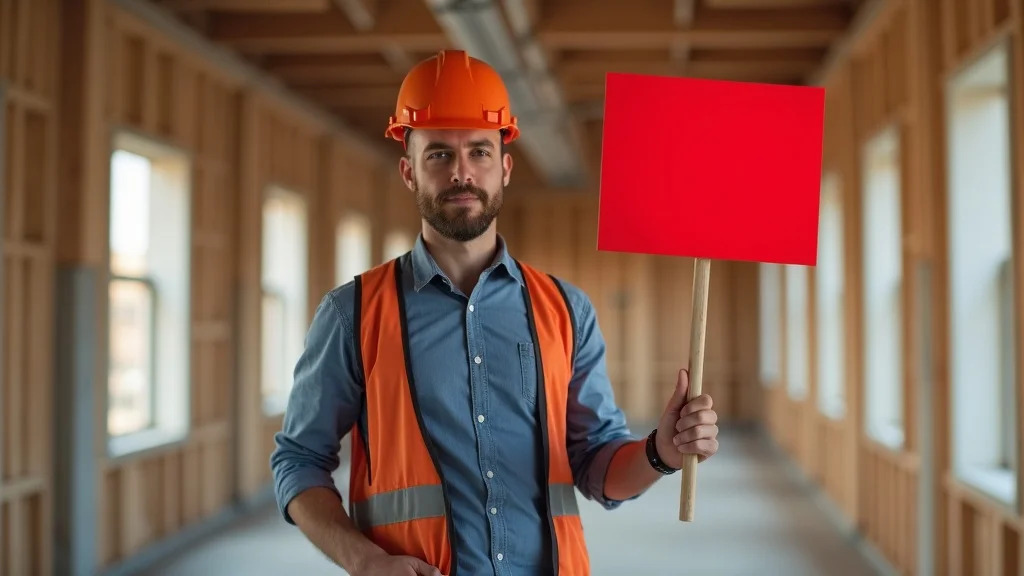
If you’re approaching the finish line of your tenant improvement construction project, a flawless project closeout isn’t just a nice-to-have—it’s your key to timely occupancy, warranty protection, and peace of mind
What You’ll Learn in This Construction Closeout Checklist Guide
- Understand the essentials of a construction closeout checklist for tenant improvements
- Key steps of the construction project closeout process, including punch lists, as-builts, warranties, and walkthroughs
- Common problems to avoid when finalizing project closeout documents
- Insight for tenants, small business owners, and property managers on what general contractors and design teams should deliver
- Important questions to ask your general contractor or broker to ensure a successful project closeout
A Surprising Fact About Construction Closeout: Why Most Projects Stumble at the Finish Line
“Did you know over 30% of commercial tenant improvements in major U.S. metros encounter delays due to incomplete construction closeout checklists and missing closeout documents?” — Industry Survey, 2023

Quick Definition: What is a Construction Closeout Checklist?
- A construction closeout checklist is a systematic list ensuring all necessary project closeout tasks, documents, and inspections are completed before tenant handover.

Why Every Tenant Should Care About Construction Project Closeout
- Ensures all contractual obligations are fulfilled before occupancy
- Reduces risk of future disputes or costly corrections
- Critical for obtaining the certificate of occupancy and securing warranties
Step-By-Step Construction Closeout Checklist for Tenant Improvements
Preliminary Steps for a Successful Project Closeout
- Notification of substantial completion
- Initiate project closeout process with all stakeholders
- Gather construction closeout documents from general contractor and design team

Kicking off the construction closeout process begins with the notification of substantial completion—when the bulk of contracted work has been finished, and the project is ready for its final evaluation. At this stage, all key players—the tenant, property manager, general contractor, and design team—should convene. It’s crucial to define everyone’s responsibilities and initiate the closeout checklist so no task is left behind. Collect all construction closeout documents: signed permits, inspection summaries, and change orders. These not only verify that work has been completed per contract specifications but set the structure for resolving any open punch lists or outstanding deliverables without misunderstandings between parties.
The preliminary step is also the time to address communication gaps that could derail a successful project closeout. If you’re a tenant or property manager, insist on a clear timeline for “when and how” documents, walk-throughs, and signoffs will occur. This transparency from your general contractor or design team minimizes costly project closeout delays, protects your final pay, and ensures readiness for the final walkthrough—all prerequisites for occupancy, warranties, and avoiding disputes in your future project.
Punch List: Identifying and Resolving Construction Items
- Definition and purpose of a punch list within the construction closeout checklist
- Typical punch list items for tenant improvements (paint touch-ups, hardware fixes, code compliance)
- Resolving punch lists efficiently with your general contractor
The punch list is the heart of the project closeout checklist. It details every incomplete or unsatisfactory item discovered during walk-throughs that must be corrected before handover. For tenant improvements, typical punch list items might include correcting drywall dings, fixing door hardware, ensuring lighting functions to code, and making last-minute touch-ups on paint or flooring. The goal is to bring the project up to contract specifications so tenants occupy a space free from hazards or unfinished details.
Efficiently resolving the punch list demands coordination between the general contractor and all trades. Property managers and tenants should attend the punch list walkthrough with their own checklist in hand. After documenting items, follow up regularly with your general contractor on progress—don’t leave this to chance. If there are disputes or multiple change orders late in the process, clarify who’s responsible for correction and signoff. Only when the punch lists are resolved should you proceed to the final payment, safeguarding a successful project closeout.
As-Builts: Accurate Documentation for Your Construction Project Closeout
- What as-builts are and why they matter in the closeout process
- Critical components of as-built drawings in closeout documents
- Ensuring accuracy and completeness for future changes or maintenance

As-built drawings are updated plans that show exactly what was built, including any on-site field changes, deviations from original design, or last-minute modifications captured throughout the construction phase. Without complete as-builts, facility maintenance and future remodeling become guesswork—key systems like HVAC routes, electrical panel locations, and emergency exits could be dangerously misdocumented. For tenant improvement closeout, your as-built should include all dimensional modifications, equipment locations, detailed notes on changes, and confirmation each item matches the final built condition.
To secure a successful project closeout, always receive a digital and printed copy of your as-builts as part of the formal closeout documents. Verify these drawings against finished site conditions with your property manager or design team before signing off on final payment. Accurate as-builts are not only essential for warranty claims, code compliance, and certificate of occupancy approval—they’re your roadmap for any future project enhancements or maintenance down the line.
Warranties, Manuals, and Certificates: Your Construction Closeout Safety Net
- Collection of warranties for equipment, systems, and finishes
- Compiling O&M (operations and maintenance) manuals as part of the closeout checklist
- Certificates of occupancy, warranties, and guarantees explained
- Confirming documents with the general contractor before final payment
The foundation of your construction closeout checklist is a full set of closeout documents protecting your investment long after move-in. This includes all warranties for installed equipment, finishes, and building systems; operations and maintenance (O&M) manuals instructing how to care for and service the space; and the all-important certificate of occupancy issued by the city or local authority. Ensure your general contractor delivers every document—especially those called for in contract specifications—before making your final payment. If a warranty or O&M manual is missing, follow up in writing and set deadlines for correction.
Having these documents on file is your safety net for handling equipment failures, requesting manufacturer support, and providing documentation for lease negotiations or future project upgrades. Missing warranties or incomplete manuals may delay occupancy approval or void your rights under material guarantees. Always store documents securely, both digitally and physically, and review all deliverables with your broker or property manager before turning over the space.
The Final Walkthrough and Inspection Stage
- Who should attend final inspection: tenant, general contractor, property manager, design team
- Key items to verify during the final walkthrough
- How to confirm the construction project is ready for closeout and handover

The final walkthrough (or final inspection) is your last opportunity to verify that all work has been completed to contract requirements, punch lists have been resolved, and all systems are safe and operational. The tenant, property manager, general contractor, and ideally the design team should conduct this inspection together. Critical checklist items include:
- Confirming all punch list items are corrected
- Testing building systems (HVAC, lighting, plumbing)
- Verifying ADA compliance and emergency exits
- Reviewing finishes for defects, cleaning, and readiness
- Checking that as-builts, closeout documents, and warranties are complete
Only when every item is addressed and documented should you confirm the construction project closeout and formally sign over the space. If you find deficiencies, document them and update your project closeout checklist accordingly before proceeding to final payment or move-in.
Tables: Construction Closeout Checklist for Tenant Improvements
| Step | Responsible Party | Documentation | Status |
|---|---|---|---|
| Notification of Substantial Completion | General Contractor | Substantial Completion Certificate | Pending / Complete |
| Punch List Walkthrough & Correction | Tenant, PM, GC | Punch List Report | Pending / Complete |
| Collection of As-Builts | General Contractor, Design Team | As-Built Drawings | Pending / Complete |
| Warranties/Manuals Submission | General Contractor | Warranty Booklets, O&M Manuals | Pending / Complete |
| Certificate of Occupancy | Project Manager, City Inspector | CO/Approval Letter | Pending / Complete |
| Final Payment | Owner/Broker | Lien Waivers, Final Pay Documents | Pending / Complete |
Essential Closeout Documents in the Construction Closeout Checklist
- Closeout Document Checklist: What Should Be Included
- Comparing closeout documents for different types of construction projects
- Tips for storing and organizing construction closeout documents digitally
- Red flags: Missing or incomplete closeout documents and how to recover them

A standardized closeout document checklist includes: permits & final inspection approvals, as-built drawings, punch list completion forms, warranty packets, O&M manuals, certificate of occupancy, lien waivers, and a final pay summary.
While core requirements remain common across commercial, industrial, or interior improvement projects, some closeout documents such as special permits, fire/life-safety inspections, or environmental certifications may be specific to project type or city codes. Digitally organizing these documents—using project management software and secure backup storage—protects you from lost paperwork, missed deadlines, or disputes with general contractors.
Watch for missing or incomplete closeout documents. If something is missing, request updates immediately and document all communications. Persistent delays in receiving final as-builts, closeout forms, or key approvals are red flags and should be escalated to your broker, legal team, or property manager before final payment. Ensuring your closeout checklist is 100% complete isn’t just best practice—it’s your shield against future project and operational risk.
Navigating Project Closeout in Complex Metro Environments
- Special considerations for Los Angeles and other major metros (permitting, after-hours access, traffic, inspection bottlenecks)
- Coordinating with local authorities for timely certificate of occupancy and approvals
- How logistics impact your construction closeout process and checklist
- Advice for property managers, brokers, and tenants facing unique city constraints

In cities like Los Angeles, construction closeout process means more than checking off punch lists—it’s about managing local logistics. Expect unique challenges: limited after-hours access, complex permitting, traffic delays, and bottlenecked city inspections. Certificates of occupancy can be held up for weeks due to city resources or missing paperwork, so constant communication with city inspectors and the project manager is critical.
If you’re a property manager or small business tenant in downtown Los Angeles or similar metro, coordinate site access, inspection appointments, and last-minute utility setups well in advance. Engage your broker and general contractor to stay ahead of approval timelines and manage final pay expectations accordingly. A thorough, customized project closeout checklist for your local environment is your insurance policy for a smooth handover.
- Short field-guide video explanation of each checklist step and document for tenant improvement closeouts
Common Pitfalls in the Construction Closeout Checklist—and How to Avoid Them
- Missed punch list items or incomplete corrections
- Overlooked as-built updates and document errors
- Incomplete warranties or manuals delaying approval for occupancy
- Failure to coordinate with general contractors on change orders and closeout process
- How to avoid these pitfalls and ensure a successful project closeout

Even well-run projects can stumble during the construction project closeout. Common pitfalls include unresolved punch lists, skipped or faulty as-builts, and forgotten warranty booklets. Sometimes, updates due to last-minute change orders don’t make it into the final project documentation, leaving property managers scrambling to resolve missing deliverables as move-in day approaches.
To avoid these headaches, review and update your closeout checklist throughout the construction process, not just at the end. Require signoffs for every punch list item, verify as-built accuracy with field checks, and audit documentation before your final inspection. Open lines of communication with the general contractor and design team are crucial—don’t let documentation slip through the cracks while focusing on the big picture. If delays persist, escalate concerns before final payment, and consider contract provisions that allow for withholding pay until every item on your construction closeout checklist is resolved.
Red Flags to Watch for in the Construction Closeout Process
- Signs your construction closeout process is off-track or at risk
- What to do if general contractors or design team are slow to deliver closeout documents
- Steps to escalate issues before final payment or occupancy deadlines
Watch for telltale signs that your closeout process is slipping: sluggish responses from your general contractor, repeated excuses for missing as-builts, or silence from the design team on incomplete punch lists. If closeout documents are promised but not delivered, trigger written reminders and specify deadlines. Should issues persist—especially as your occupancy deadline nears—escalate: bring in your broker, consult legal, or withhold final payment as leverage. Don’t accept handover until every element of your project closeout checklist is in hand.
These red flags aren’t just frustrating—they put your certificate of occupancy and operational launch at risk. Proactive management, tight documentation, and a willingness to escalate are your best defenses against costly construction closeout setbacks.
Printable Construction Closeout Checklist: What to Ask Your General Contractor or Broker
- Key questions for your general contractor during project closeout
- Questions to verify closeout process, punch list items, and documentation
- Printable and shareable checklist resources for owners and brokers

Before signing off on your tenant improvement buildout, ask your general contractor:
- Have all closeout documents—including as-builts, warranties, and the certificate of occupancy—been delivered and approved?
- Are there any unresolved punch list items? Who is responsible for completion, and what is the timeline?
- Were there any change orders late in the project, and have those changes been properly documented?
- Is a final pay or retainage being withheld pending any remaining work? What are the terms?
- Are digital copies of all documents stored and backed up for easy future reference?
Project Closeout Checklist FAQs
What is a project closeout checklist?
- Answer: A project closeout checklist is a comprehensive list of tasks and documents required to ensure a construction project is fully completed, meets all contractual obligations, and is ready for handover to the owner or tenant.
What are the 7 steps to closing a project?
- Answer: The seven steps typically include: (1) Confirming substantial completion, (2) Creating and resolving punch lists, (3) Assembling closeout documents, (4) Submitting warranties and manuals, (5) Conducting final inspections, (6) Securing certificate of occupancy, and (7) Finalizing payment to contractors.
What 5 steps need to be taken at contract closure time?
- Answer: At contract closure, ensure (1) all contractual deliverables are met, (2) all documentation is collected and approved, (3) outstanding payments are settled, (4) warranties and manuals are handed over, and (5) official sign-off is completed by all parties.
What three things are usually included in a closeout report?
- Answer: A closeout report typically contains (1) a summary of the work completed and its compliance with the original scope, (2) all closeout documents including as-builts and warranties, and (3) any outstanding items or recommendations for future maintenance.
FAQs: Construction Closeout Checklist Essentials
- What if my general contractor cannot provide all closeout documents?
Request the documents in writing and set a firm deadline. Delay final pay or occupancy approval as leverage. Consult your broker or legal counsel if the delay persists. - How should I handle disputes over unfinished punch list items?
Document all concerns, review responsibilities with your general contractor, and if needed, escalate the dispute to your broker or property manager before final signoff or payment. - Can I occupy the space before the construction closeout checklist is finished?
It’s highly discouraged—without a completed checklist, you risk missing vital approvals, code compliance, or losing critical warranties. Always confirm with your local authorities and insurer first. - What documents should my broker and property manager keep on file?
All closeout documents: as-builts, warranties, O&M manuals, inspection reports, certificate of occupancy, and final payment records.
Key Takeaways
- Never assume all closeout documents are in order—verify everything with your general contractor.
- Punch lists and as-builts protect you from future headaches.
- Final payment should always hinge on the complete construction closeout checklist.
- Ask the right questions early to keep your construction project on track.
Ready to take control of your tenant improvement closeout?
Download our free printable closeout checklist or Email this summary to your general contractor or broker to ensure a smooth finish and stress-free handover.